Diablo 4: How Artificer Tiers Work

Diablo 4: How Artificer Tiers Work

The Artificer Tiers in Diablo 4 represent one of the most important endgame progression systems introduced through The Pit of the Artificers. If you want to push high-end content, farm top-tier Diablo 4 Items, or unlock Masterworking upgrades, understanding how Artificer Tiers work is essential.

These tiers function like a scaling difficulty ladder inside The Pit, where each cleared level increases challenge and rewards. The higher you climb, the more powerful materials, gear, and progression systems you unlock, making it a core part of endgame optimization in Season 13.

This guide explains exactly how to unlock Artificer Tiers, how progression works, and how to push higher efficiently.

What Are Artificer Tiers in Diablo 4?

Artificer Tiers are the difficulty levels inside The Pit of the Artificers, a timed endgame dungeon introduced in Season 4 and expanded in later updates. Each tier increases enemy level, density, and boss difficulty while improving rewards.

The system is essentially Diablo 4’s equivalent of scaling endgame rifts:

·Higher tier = harder enemies

·Higher tier = better loot

·Higher tier = more Masterworking materials

·Higher tier = stronger Diablo 4 Item drops

Players use this system to test build strength and optimize endgame farming efficiency.

How to Unlock The Pit (Required for Artificer Tiers)

Before you can access Artificer Tiers, you must first unlock The Pit itself.

Unlock Requirements:

You generally need to:

·Reach max-level endgame (typically Level 60 in modern systems)

·Unlock World Tier IV (Torment difficulty)

·Complete a high-tier Nightmare Dungeon

·Obtain Runeshards or Artificer’s Stones

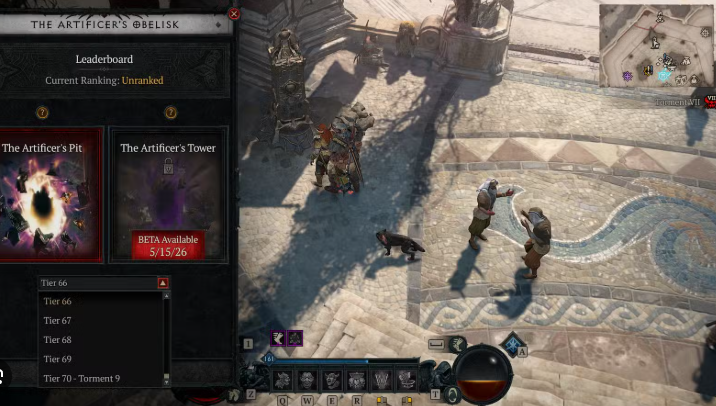
Once completed, you gain access to The Pit via the Artificer’s Obelisk in Cerrigar, Scosglen.

After your first completed run, the full tier system becomes available.

How Artificer Tiers Work

Once unlocked, The Pit opens a scalable tier system ranging from low entry levels up to extremely high-end challenges.

Core Rules:

Each run follows a simple loop:

1. Enter The Pit using Runeshards

2. Kill enemies to fill the progress bar

3. Spawn and defeat the dungeon boss

4. Complete run within the time limit

If you succeed, you unlock higher tiers.

How to Unlock Higher Artificer Tiers

Progression is based entirely on performance.

The faster you complete a tier, the more tiers you can unlock at once:

·Fast clear (high remaining time) → unlock multiple tiers

·Moderate clear → unlock 1-2 tiers

·Slow clear → unlock only next tier

This system rewards optimized builds and strong Diablo 4 Items setups that clear efficiently instead of slowly surviving.

You do NOT need to replay every tier individually; skipping tiers is part of normal progression if you perform well.

Why You Need Artificer Tiers for Endgame

Artificer Tiers are not just optional content-they are a gateway to Diablo 4’s strongest progression systems.

Key Rewards:

·Masterworking materials

·High-tier Legendary drops

·Greater Affix Diablo 4 Items

·Endgame crafting resources

The Pit is the only reliable source of Masterworking materials, making it mandatory for competitive endgame builds.

Without progressing Artificer Tiers, your gear will eventually hit a power ceiling.

Best Strategies to Push Artificer Tiers Faster

If you want to climb efficiently, your build and farming strategy matter more than anything.

1. Optimize Your Build for Speed

High-tier pushing requires:

·Strong AoE damage

·Fast mobility

·Efficient resource generation

·Strong boss damage

Slow builds may struggle even if they are tanky.

2. Prioritize Diablo 4 Items With Synergy

Your Diablo 4 Items should focus on:

·Cooldown reduction

·Critical Strike scaling

·Vulnerable damage

·Resource efficiency

·Survivability layers

Well-rolled gear dramatically increases tier progression speed.

3. Don’t Over-Upgrade Too Early

Many players waste resources upgrading low-tier gear.

Instead:

·Wait for Ancestral or high-end drops

·Focus on Greater Affixes

·Only invest in long-term items

This ensures efficient progression through higher tiers.

4. Farm Efficient Gold for Crafting

Endgame progression is heavily tied to crafting costs.

Many players choose to buy Diablo IV gold to support:

·Masterworking upgrades

·Enchant rerolls

·Gear optimization

·High-tier crafting loops

Gold becomes a major bottleneck once you reach higher Artificer Tiers.

Common Mistakes When Unlocking Artificer Tiers

Avoid these common issues:

·Entering the Pit too early without optimized gear

·Ignoring damage scaling in favor of pure defense

·Not upgrading key Diablo 4 Items before pushing tiers

·Farming too slowly instead of efficiently

·Wasting Runeshards on weak builds

Efficiency matters more than raw survivability in most cases.

Final Thoughts

Artificer Tiers in Diablo 4 represent the backbone of endgame progression through The Pit of the Artificers. Unlocking them is a major milestone that signals your transition into true high-end content.

Diablo 4 Wreath of Auric Laurel Guide

Diablo 4 Wreath of Auric Laurel Guide

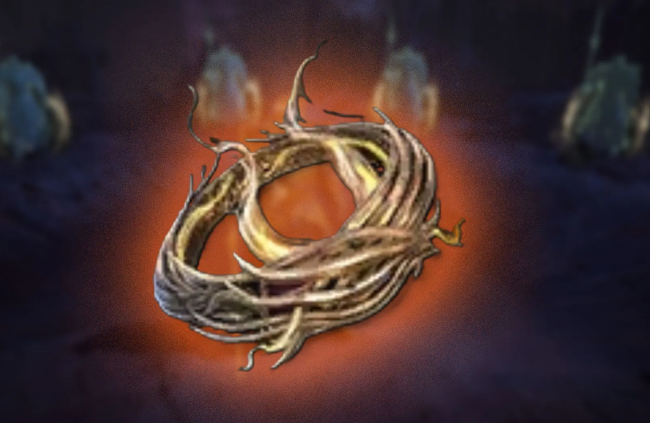
The Wreath of Auric Laurel is one of the most powerful Paladin-exclusive rings in Diablo 4, designed for players who want to dominate endgame content through crowd control and explosive damage amplification. This unique ancestral ring transforms Holy Bolt into a reliable debuff engine, enabling Purify procs that dramatically increase damage taken by enemies. For Paladin builds centered on dazing, staggering, and overwhelming elites, the Wreath of Auric Laurel is a near-mandatory pickup.

In this guide, we’ll cover what makes the Wreath of Auric Laurel special, break down its stats and unique effects, and explain the most efficient ways to farm it in Diablo 4.

Diablo 4: What Is the Wreath of Auric Laurel?

The Wreath of Auric Laurel is an ancestral, unique ring exclusive to the Paladin class. Unlike generic damage rings that simply increase stats, this item is deeply tied to Paladin mechanics. Its core purpose is to reward crowd control by enabling Purify through Holy Bolt and massively increasing damage taken by affected enemies.

Because Paladin builds often rely on control effects like daze, stagger, and knockdown to survive and scale damage, the Wreath of Auric Laurel fits seamlessly into both single-target boss builds and high-density area-clearing setups. In endgame content such as Nightmare Dungeons, Helltides, and Torment boss encounters, this ring provides consistent value rather than situational power.

Stats of the Wreath of Auric Laurel

The Wreath of Auric Laurel rolls with an excellent mix of offensive stats that scale extremely well with Masterworking:

·+(8.0 – 10.0)% Attack Speed (up to +15.0% with mastercrafting)

·+(1 – 2) to Dizzying Blow (up to +3 with mastercrafting)

·+(7.0 – 8.0)% Critical Strike Chance (up to +12.0% with mastercrafting)

·+(107 – 121) Strength (up to +182 with mastercrafting)

These stats directly reinforce its unique effect. Higher attack speed results in more Holy Bolt casts, increasing the frequency of Purify procs. Dizzying Blow amplifies damage against crowd-controlled enemies, while Critical Strike Chance and Strength boost overall damage scaling. When fully optimized, this ring becomes a cornerstone piece among high-end Diablo 4 Items for Paladins.

Unique Effects of the Wreath of Auric Laurel

Lucky Hit: Holy Bolt has up to a 40% chance to trigger Purify.

Purify: Enemies take (25 – 55)% [x] increased damage for 4 seconds.

This unique effect is what pushes the Wreath of Auric Laurel into top-tier territory. Holy Bolt is commonly used in Paladin builds due to its reliability and scaling. With this ring equipped, Holy Bolt becomes a powerful debuff tool, dazing enemies and opening a short window where they take massively increased damage from all sources.

This makes the ring especially effective in group play, boss fights, and elite-heavy Nightmare Dungeons, where coordinated burst damage during Purify windows can delete high-health targets.

How to Get the Wreath of Auric Laurel in Diablo 4

Like most endgame Diablo 4 Items, the Wreath of Auric Laurel can drop from several sources, but targeted farming is far more efficient.

Boss Farming

Boss farming is the most reliable way to target specific, unique items.

1) Grigoire, the Galvanic Saint

·Location: Hall of the Penitent Dungeon, Dry Steppes

·Difficulty: Torment

·Boss Hoard Key: 12× Living Steel

Living Steel can be obtained from:

·Tortured Gift of Mysteries during Helltides

·Kurast Undercity using the Tribute of Titans

·Asteroth during Escalating Nightmares

2) The Beast in the Ice

·Location: Glacial Fissure Dungeon, Fractured Peaks

·Difficulty: Torment

·Boss Hoard Key: 12× Distilled Fear

Distilled Fear drops from:

·Kurast Undercity with Tribute of Titans

·Nightmare Dungeons using Nightmare Sigils

Repeatedly farming these bosses offers the best odds of securing the Wreath of Auric Laurel.

Nightmare Dungeons and World Events

Nightmare Dungeons remain one of the most efficient activities in Diablo 4. High enemy density and end-of-dungeon rewards provide frequent chances at unique drops while also granting Glyph experience and crafting resources. These runs are especially valuable if you plan to buy Diablo 4 materials to accelerate Masterworking and gear optimization.

Helltides and World Events are also excellent sources of unique items. During Helltides, prioritize opening:

·Tortured Gift of Jewelry: Ring (75 Aberrant Cinders)

·Tortured Gift of Mystery (250 Aberrant Cinders)

Jewelry chests help target rings directly, while Mystery chests offer higher overall unique drop rates.

Gambling for Rings Using Obols

You can gamble for rings at the Purveyor of Curiosities using Murmuring Obols. Each ring costs 50 Obols. While convenient, this method has a very low unique drop rate and should be treated as a supplemental option rather than a primary farming strategy.

Final Thoughts

The Wreath of Auric Laurel is a standout, unique ring for Paladin players who thrive on crowd control and damage amplification. Its strong stat rolls, powerful Purify-based unique effect, and exceptional synergy with Dizzying Blow make it one of the most impactful rings available in Diablo 4. If you’re pushing Torment difficulty or optimizing a control-focused Paladin build, this ring is absolutely worth the grind.

Diablo 4 Season 9: Hyperspeed Teleport Necromancer Endgame Build Guide

Diablo 4 Season 9: Hyperspeed Teleport Necromancer Endgame Build Guide

If you thought Necromancers were slow-paced summoners skulking behind skeletal walls, think again. With the launch of Season 9: Sins of the Horadrim, a bizarre and likely unintended interaction between two Horadric Powers has unlocked one of the fastest builds in Diablo 4 history: the Hyperspeed Teleport Necromancer.

This build combines glitch exploitation with elite-tier dungeon clearing, letting you permanently teleport across the map, shred enemies with curses, and annihilate farming routes faster than any Sorcerer Blink, Rogue Dash, or Druid Lunge. With the right Diablo 4 items and Attack Speed breakpoints, this Necromancer becomes a speedrunning nightmare for Sanctuary.

Concept Overview – What Makes Teleport Infinity Possible

At the heart of this build is the interaction between two Season 9 Horadric Powers:

·Cosmic Anomaly: Randomly spawns rifts that trigger special effects.

·Floating Bubble: Occasionally spawns an orb that grants a blink-like teleport when walked into, with a 4-second cooldown.

Individually, these powers are unremarkable. However, when paired and forced into a glitch state through animation canceling and high Attack Speed breakpoints, they allow your Necromancer to teleport faster than the game can register the cooldown. The result is near-instantaneous, infinite teleports across dungeons, allowing you to move and kill at an unprecedented pace.

How to Set Up the Glitch

Executing this glitch requires a precise rhythm:

1. Activate Cosmic Anomaly and Floating Bubble on your Season 9 power board.

2. Enter a dungeon (practice outside The Pit first).

3. Rapidly spam Iron Maiden to constantly proc Cosmic Anomaly.

4. Move in tight circles with your mouse slightly ahead of your character.

5. Wait for a Floating Bubble to spawn.

6. Force your character to collide with the Cosmic Anomaly orb while entering the Floating Bubble, creating an animation lock.

7. If successful, your character begins rapid, uncontrollable teleportation.

Once locked, continue casting Iron Maiden to maintain the glitch.

Buy Diablo IV Items, Gear, and Stat Priorities

To reliably trigger the glitch, specific Attack Speed breakpoints are mandatory:

·Weapon: +Attack Speed, +Core Skill Damage; fast base (dagger/focus) preferred

·Gloves: +Attack Speed for glitch consistency

·Amulet: +AS, +Cooldown Reduction

·Rings: +AS or Lucky Hit to proc extra anomalies

·Boots: Evade CDR, Movement Speed

·Off-Hand: Rune Word capable (CDR/AS synergy)

·Armor: Damage reduction and armor % to survive teleport chaos

Goal: reach Attack Speed Breakpoint Tier 2+. Below this, the glitch is inconsistent.

Skill Setup & Specializations

·Iron Maiden: Core spam skill to proc Cosmic Anomaly

·Bone Prison: Optional, for mob grouping

·Blood Mist: Defensive panic button while teleporting

·Corpse Tendrils: Crowd control and defense breaks

·Decrepify: Optional against bosses

·Reap/Bone Splinters: Generator if needed

Damage comes from curse amplification, Horadric Power ticks, and rapid movement, not direct skills.

Advantages

·Fastest build in the game – outruns every other mobility skill

·Excellent for Pit farming, Helltide, Legion Events, and NMD resets

·Unique, chaotic gameplay – like playing an action movie in fast-forward

·Necromancer finally outruns the Rogues

Disadvantages

·Glitch is inconsistent; requires practice

·May cause FPS drops, desync, or crashes

·Mechanically heavy – requires precise inputs

Gameplay Loop

1. Enter dungeon → spam curses until glitch triggers.

2. Once hyperspeed teleport activates → target objectives at lightning speed.

3. Kite enemies while laying curses dynamically.

4. Kill elites → grab loot → teleport to the next cluster.

5. Maintain movement; reset glitch if it stops.

Pro Tips:

·Small circular mouse movements help maintain anomaly range

·Tight corridors improve glitch consistency

·Practice in lower-tier dungeons before attempting The Pit

·Resetting dungeons may yield a better lock than forcing the glitch

Ideal Content to Farm

·Pit 50+ – S-tier (if glitch stable)

·Nightmare Sigils – S-tier

·Helltide, Blood Harvest, Legion Events – A-tier

·Bossing – B-tier (setup slower)

Final Thoughts

The Hyperspeed Teleport Necromancer is less a traditional build and more a speedrunner’s dream. It’s fast, glitchy, chaotic, and incredibly fun, demonstrating why ARPGs continue to excite players with emergent gameplay.

Before Blizzard patches this interaction, master the inputs and become the fastest Necromancer in Sanctuary. Use it to dominate The Pit, flex in PvE lobbies, speedfarm uniques, or simply revel in bending reality to your will.