Path of Exile 2: Ancestral Warrior Totem Build Guide

Path of Exile 2: Ancestral Warrior Totem Build Guide

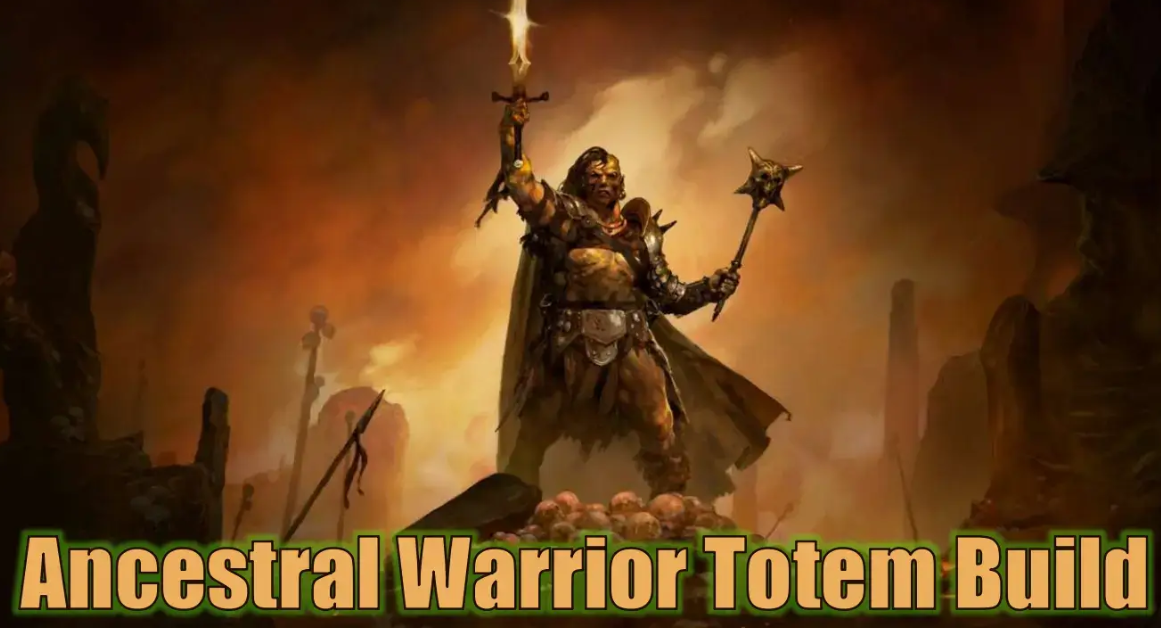
Path of Exile 2 Patch 0.3.1 brings fresh life to one of the most unusual yet entertaining setups in the game – the Ancestral Warrior Totem Build. While many players focus on meta powerhouses like Lightning Arrow or Hollow Palm builds, this off-meta totem berserker offers something entirely different: a clever synergy of charge generation, self-damage triggers, and Warlord mechanics.

This build may not break records in raw DPS, but it’s one of the most creative and satisfying ways to clear high-tier maps and mid-tier bosses while standing out as part of the elite “0.001% club” of Path of Exile 2 innovators.

How the Build Works

At its core, the build centers on spawning multiple Ancestral Warrior Totems, which require three Endurance Charges each to summon. Normally, maintaining these charges is tricky – but with some clever Path of Exile 2 Items combinations, it becomes perfectly consistent.

Here’s how the Endurance Charge engine works step by step:

1. Self-Damage Trigger: Every time you use a skill, you take Physical Damage from Scold’s Bridle.

2. Damage Conversion: The Molten Being charm converts 5% of that Physical Damage into Fire Damage.

3. Charm Chain Reaction: Taking Fire Damage triggers Ngamahu’s Chosen charms – the build uses three of them for consistency.

4. Rage Generation: Each Ngamahu’s Chosen grants maximum Rage, which triggers Hateforge to give you three random Charges.

5. Charge Multiplication: Serpent’s Egg doubles those gains, granting six charges per trigger instead of three.

6. Infinite Charm Cycling: Pragmatism ensures that charms consume no charges, while Bijouborne reduces their cooldown duration, allowing constant reactivation.

This process lets you sustain Endurance Charges indefinitely, keeping 10 or more Ancestral Warrior Totems active at once – an army of spectral berserkers crushing everything in sight.

Strengths and Weaknesses

Strengths

·Ultra-unique playstyle: Few builds in Path of Exile 2 look or feel like this.

·Budget-friendly: Most required uniques are cheap, aside from the weapon.

·Capable of juiced T15 clears.

·Can defeat some max-difficulty bosses with practice and patience.

·Hilariously entertaining – watching totems explode enemies never gets old.

Weaknesses

·Not a meta DPS monster – it’s solid but not broken.

·Low life pool compared to meta builds.

·Somewhat complex setup involving multiple charms and interactions.

If you’re looking for a quirky, working off-meta build that’s not another Lightning Arrow clone, this is it.

Equipment Setup

The build uses two weapon sets, both featuring the same weapon and shield (you must lock them by right-clicking the weapon and shield icons in your inventory).

Key Gear Pieces

·Scold’s Bridle: Enables the self-damage trigger for your charge generation engine.

·Molten Being: Converts physical self-damage into fire damage to activate charms.

·Ngamahu’s Chosen (x3): Core of the build – triggers Rage and charges via Hateforge.

·Hateforge: Generates random charges when Rage is gained.

·Serpent’s Egg: Doubles the number of charges gained.

·Pragmatism: Makes charm use free.

·Bijouborne: Reduces charm cooldowns for faster cycling.

·Chernobog’s Pillar: A Great shield that adds solid damage and defense.

·Megalomaniac: Look for a Fortified Location for totem-based damage and armor.

·From Nothing + Bulwark: Allocates Warlord Leader for 40% more damage.

·Rings & Boots: Prioritize Life, Resistances, and Movement Speed.

Tip: To craft a strong mace cheaply, buy one with 1 empty prefix and high Physical DPS, add a Desecrated Prefix, reveal a third Physical Damage mod, and finish with a Perfect Essence of Battle for +4 weapon levels.

Skill Gem Setup

This build keeps things simple – only five skills are required for optimal gameplay.

Weapon Set 1 – Shockwave Totem

·Shockwave Totem (main skill)

·Magnified Area I or Astral Projection for flexible AoE or reach

·Support gems tuned for totem damage and area clear

Weapon Set 2 – Ancestral Warrior Totem

·Ancestral Warrior Totem (main DPS skill)

·High-duration and high-damage support gems for sustained totem uptime

Additional utility skills:

·Charge Regulation: Provides increased skill speed and defensive bonuses.

·Magma Barrier: Adds Block Chance for survivability.

·Shield Charge: Optional mobility tool.

Make sure to assign Shockwave Totem only to Weapon Set 1 and Ancestral Warrior Totem only to Weapon Set 2. Lock both weapon sets to use the same mace and shield.

Passive Tree Highlights

·Totem nodes: Maximize totem life, damage, and placement speed.

·Charge Regulation cluster: For consistent buff uptime.

·Warlord Berserker & Warlord Leader: Though Berserker doesn’t apply directly to totems in 0.3.1, From Nothing still makes Warlord Leader a worthwhile pickup for 40% damage.

·Defensive layers: Mix of Endurance Charge effects and Armor scaling via Fortified Location.

How It Plays

The Ancestral Warrior Totem Build is incredibly low-input – you’ll only use two active buttons most of the time. Deploy your totems, trigger charges, and watch your spectral army pulverize anything in its path. With constant Endurance Charge generation and near-infinite Rage uptime, the build maintains momentum even in prolonged fights.

It’s not the flashiest meta build in Path of Exile 2, but it’s one of the most enjoyable ways to experiment with unorthodox mechanics and clever charm interactions – and it works.

Final Thoughts

The Ancestral Warrior Totem Build is a triumph of creativity in Path of Exile 2 Patch 0.3.1. It shows how inventive players can transform underused mechanics into powerful, functional builds. If you’re tired of mainstream setups and want something fun, functional, and distinctly off-meta, this Warlord totem summoner is the way to go.

To fully optimize your setup, where you can buy POE2 Items to maximize your totem potential.
Diablo 4 Season 9: Hyperspeed Teleport Necromancer Endgame Build Guide

Diablo 4 Season 9: Hyperspeed Teleport Necromancer Endgame Build Guide

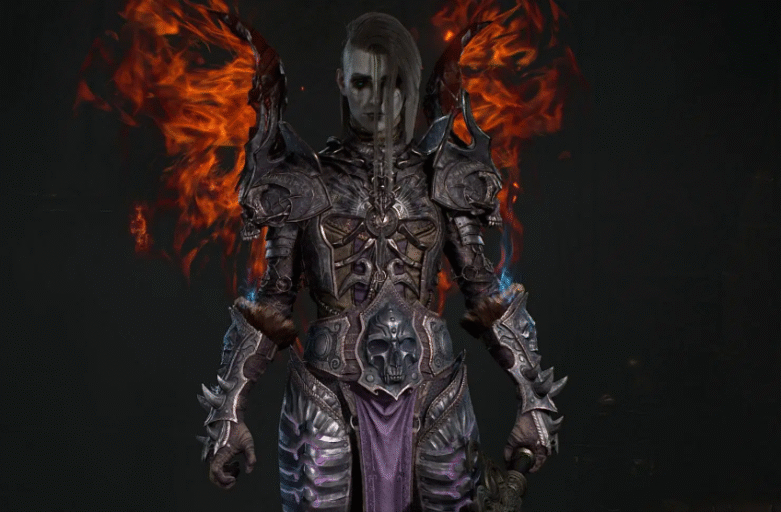
If you thought Necromancers were slow-paced summoners skulking behind skeletal walls, think again. With the launch of Season 9: Sins of the Horadrim, a bizarre and likely unintended interaction between two Horadric Powers has unlocked one of the fastest builds in Diablo 4 history: the Hyperspeed Teleport Necromancer.

This build combines glitch exploitation with elite-tier dungeon clearing, letting you permanently teleport across the map, shred enemies with curses, and annihilate farming routes faster than any Sorcerer Blink, Rogue Dash, or Druid Lunge. With the right Diablo 4 items and Attack Speed breakpoints, this Necromancer becomes a speedrunning nightmare for Sanctuary.

Concept Overview – What Makes Teleport Infinity Possible

At the heart of this build is the interaction between two Season 9 Horadric Powers:

·Cosmic Anomaly: Randomly spawns rifts that trigger special effects.

·Floating Bubble: Occasionally spawns an orb that grants a blink-like teleport when walked into, with a 4-second cooldown.

Individually, these powers are unremarkable. However, when paired and forced into a glitch state through animation canceling and high Attack Speed breakpoints, they allow your Necromancer to teleport faster than the game can register the cooldown. The result is near-instantaneous, infinite teleports across dungeons, allowing you to move and kill at an unprecedented pace.

How to Set Up the Glitch

Executing this glitch requires a precise rhythm:

1. Activate Cosmic Anomaly and Floating Bubble on your Season 9 power board.

2. Enter a dungeon (practice outside The Pit first).

3. Rapidly spam Iron Maiden to constantly proc Cosmic Anomaly.

4. Move in tight circles with your mouse slightly ahead of your character.

5. Wait for a Floating Bubble to spawn.

6. Force your character to collide with the Cosmic Anomaly orb while entering the Floating Bubble, creating an animation lock.

7. If successful, your character begins rapid, uncontrollable teleportation.

Once locked, continue casting Iron Maiden to maintain the glitch.

Buy Diablo IV Items, Gear, and Stat Priorities

To reliably trigger the glitch, specific Attack Speed breakpoints are mandatory:

·Weapon: +Attack Speed, +Core Skill Damage; fast base (dagger/focus) preferred

·Gloves: +Attack Speed for glitch consistency

·Amulet: +AS, +Cooldown Reduction

·Rings: +AS or Lucky Hit to proc extra anomalies

·Boots: Evade CDR, Movement Speed

·Off-Hand: Rune Word capable (CDR/AS synergy)

·Armor: Damage reduction and armor % to survive teleport chaos

Goal: reach Attack Speed Breakpoint Tier 2+. Below this, the glitch is inconsistent.

Skill Setup & Specializations

·Iron Maiden: Core spam skill to proc Cosmic Anomaly

·Bone Prison: Optional, for mob grouping

·Blood Mist: Defensive panic button while teleporting

·Corpse Tendrils: Crowd control and defense breaks

·Decrepify: Optional against bosses

·Reap/Bone Splinters: Generator if needed

Damage comes from curse amplification, Horadric Power ticks, and rapid movement, not direct skills.

Advantages

·Fastest build in the game – outruns every other mobility skill

·Excellent for Pit farming, Helltide, Legion Events, and NMD resets

·Unique, chaotic gameplay – like playing an action movie in fast-forward

·Necromancer finally outruns the Rogues

Disadvantages

·Glitch is inconsistent; requires practice

·May cause FPS drops, desync, or crashes

·Mechanically heavy – requires precise inputs

Gameplay Loop

1. Enter dungeon → spam curses until glitch triggers.

2. Once hyperspeed teleport activates → target objectives at lightning speed.

3. Kite enemies while laying curses dynamically.

4. Kill elites → grab loot → teleport to the next cluster.

5. Maintain movement; reset glitch if it stops.

Pro Tips:

·Small circular mouse movements help maintain anomaly range

·Tight corridors improve glitch consistency

·Practice in lower-tier dungeons before attempting The Pit

·Resetting dungeons may yield a better lock than forcing the glitch

Ideal Content to Farm

·Pit 50+ – S-tier (if glitch stable)

·Nightmare Sigils – S-tier

·Helltide, Blood Harvest, Legion Events – A-tier

·Bossing – B-tier (setup slower)

Final Thoughts

The Hyperspeed Teleport Necromancer is less a traditional build and more a speedrunner’s dream. It’s fast, glitchy, chaotic, and incredibly fun, demonstrating why ARPGs continue to excite players with emergent gameplay.

Before Blizzard patches this interaction, master the inputs and become the fastest Necromancer in Sanctuary. Use it to dominate The Pit, flex in PvE lobbies, speedfarm uniques, or simply revel in bending reality to your will.

Diablo 4 Season 10 PTR Test:Strongest Builds for Each Class

Diablo 4 Season 10 PTR Test:Strongest Builds for Each Class

The Diablo 4 Season 10 PTR has shaken up the landscape of Sanctuary with some of the boldest changes yet, and the community is already buzzing about what the strongest builds might look like when the season officially launches. While it’s important to stress that this meta is still forming – and Blizzard could introduce further balance changes before Season 10 goes live – early testing gives us a clear picture of what classes are pulling ahead.

Some builds, like Hydra Sorcerer or Twisting Blades Rogue, look comfortably strong. Others, such as Necromancer Shadow Blight or Spiritborn Jaguar Thorns, are shaping up as sleeper overpowered contenders. That said, not every class is in a great place, and some may need tuning.

1.Barbarian:Whirlwind / Mighty Throw Hybrid

    The Barbarian has always been a class that thrives on raw, relentless power, and Season 10 is no exception. Thanks to the new Unique weapon Sabre of Tsasgal, Barbarians are seeing a massive meta shift toward a hybrid Whirlwind / Mighty Throw / Hammer of the Ancients build.Instead of wasting countless hours farming for gold, choose MMOexp for a fast, secure, and affordable Diablo 4 gold delivery.

    A build that clears waves of enemies with Whirlwind, chunks down elites with Mighty Throw, and then crushes bosses with Hammer of the Ancients. It’s flexible, satisfying, and highly effective in both open-world farming and endgame dungeons.

    This may very well become the Barbarian meta build for Season 10.

    2.Druid:Rotting Lightbringer Pulverize

      Druids are also experiencing a renaissance this season, largely thanks to Chaos Armor, a new mechanic that allows legendary effects to be slotted into Diablo 4 Items in unexpected ways. With it, the fan-favorite Rotting Lightbringer Pulverize build has gotten a huge boost.

      Instead of being limited to holding Rotting Lightbringer as a weapon, you can now equip it as a Chaos Armor slot – for example, in your gloves – with boosted stats. This opens up the opportunity to equip another powerful weapon, such as The Grandfather, further stacking your damage potential.

      3.Necromancer:Shadow Blight

        If there’s one Necromancer build that stands above the rest in Season 10 PTR, it’s Shadow Blight. While skills like Blood Wave and Lidless Wall Bonestorm have been putting up impressive numbers in The Pit, Shadow builds have skyrocketed in potential thanks to recent buffs.

        This synergy makes Necromancers capable of dealing absurd damage numbers, with the potential for billions and even trillions of damage under the right conditions. Add in Ebonpiercer and Reaper Pursuit for consistency, and you have a Necro build that doesn’t just compete at the top – it dominates.

        Shadow Blight is shaping up to be the strongest Necro build of Season 10, especially for players focused on high-end farming and bossing.

        4.Rogue:Twisting Blades

          The Rogue has had a tough time recently, and sadly, Season 10 doesn’t seem to improve its overall standing. While there were high hopes for Reload Rogue and other Chaos Perk-driven setups, nothing in PTR testing suggests a breakthrough.

          That said, Twisting Blades Rogue remains the class strongest and most reliable option. It’s a build that excels in fast, fluid combat, weaving between enemies and exploiting the returning blades for massive AoE bursts.

          5.Sorcerer:Hydra

            While Lightning builds are heavily promoted in Season 10, the reality is that Hydra Sorcerer continues to outperform nearly everything else in Diablo 4 right now.

            Hydra Sorc has been powerful for multiple seasons, but the introduction of Chaos Armor has pushed it into absurd territory. Now, Sorcerers can equip multiple Hydra-boosting Amulets simultaneously rather than being locked into a single best-in-slot.

            The Hydra swarm not only melts bosses but also provides excellent map-clearing efficiency. With scaling that keeps getting better and synergy that doesn’t require excessive micromanagement, Hydra Sorcerer isn’t just the Sorc best build – it’s arguably the single most overpowered build of Season 10 PTR.

            6.Spiritborn:Jaguar Thorns

              The new class, Spiritborn, has been one of the most exciting additions to Diablo 4. While they’ve shown great potential in The Pit, the real standout build so far in Season 10 is Jaguar Thorns.

              Here’s how it works:combining which you buy Diablo IV Items Aspect of the Plains with Balazan’s Maxtlatl lets Spiritborn shatter enemy packs with massive thorn-based counterattacks.

              That said, it’s important to remember that this is still PTR testing. Blizzard has plenty of time to make adjustments, and what feels “meta-defining” now could shift dramatically when Season 10 launches.Get your cheap Diablo IV Items from MMOexp and conquer Sanctuary with ease.

              For now, though, players looking to get ahead of the curve should keep an eye on these six builds. Whether you prefer the raw power of Whirlwind Barbarian, the pet-like dominance of Hydra Sorc, or the edgy risk-reward playstyle of Jaguar Spiritborn, Season 10 promises to deliver one of the most diverse and chaotic metas Diablo 4 has seen yet.

              Diablo 4 Launches Surprise Loot Event

              Diablo 4 Launches Surprise Loot Event

              In the ever-expanding universe of Diablo 4, surprises have become a regular fixture. Blizzard Entertainment’s approach to releasing content is a blend of planned excitement and unexpected twists, keeping players on their toes while also delivering the kind of deep, rewarding gameplay that the Diablo franchise is known for. One of the most recent surprises to hit Diablo 4 is the launch of a surprise loot event, which has sent players flocking back into the depths of Sanctuary for a chance to earn exclusive rewards, powerful gear, and valuable crafting Diablo 4 materials.

              The announcement of this unexpected event has stirred up excitement within the community, offering both casual players and die-hard fans of the series a golden opportunity to maximize their loot acquisition and boost their characters’ progression. But what exactly is the surprise loot event, what are the rewards, and how can you make the most out of it? Let’s break down everything you need to know about this special event and why it’s an essential moment for every Diablo 4 player.

              The Surprise Loot Event: What’s the Deal?

              While Diablo 4 has had planned events in the past, such as seasonal updates, new content releases, and world bosses, the surprise loot event is a different beast entirely. Instead of being part of a regular content update or the release of new patches, this event was announced with very little notice, catching players off guard in the best possible way. This makes it feel special — an unexpected gift from Blizzard that adds another layer of excitement to an already rich game world.

              The event, which lasts for a limited time, increases the chances of encountering rare loot drops while adventuring throughout Sanctuary. This includes powerful legendary and set items, as well as materials that can be used for crafting high-end gear. This uptick in loot drops isn’t just restricted to any one area of the game; players can expect to see increased rewards in dungeons, world events, elite monster encounters, and even regular mob kills, meaning there’s something for everyone to enjoy regardless of how they prefer to play.

              Key Features of the Loot Event

              The surprise loot event comes with several key features that make it an enticing opportunity for players:

              1. Increased Loot Drop Rates

              This is the main highlight of the event. Players will experience a marked increase in the drop rates for rare, legendary, and even unique items. The event is designed to enhance the excitement of exploration and combat by giving players more chances to find items that can upgrade their gear and help them in their battles against the forces of Hell. Whether you’re running through random encounters, tackling boss fights, or completing group dungeons, the chances of encountering top-tier loot are much higher.

              2. Chance for Legendary and Set Items

              As the event boosts loot drop rates, one of the most exciting features is the increased likelihood of finding legendary and set items. For players who have been grinding for that one elusive legendary weapon or piece of armor to complete their build, this event is a godsend. With more opportunities to acquire these coveted items, players can quickly upgrade their gear and continue to power through the game’s endgame content or even speed up their progression through the story.

              For those who are aiming to complete specific set bonuses, the event gives them an extra advantage by offering more chances to acquire the specific pieces needed for that all-important set.

              3. Crafting Materials and Upgrade Opportunities

              Another valuable reward during the loot event is an increased drop rate of crafting materials. Whether you are focusing on upgrading your gear or creating new items through the Blacksmith or Jeweler, this event offers a rare opportunity to gather valuable resources. Materials that are typically hard to come by—like Refined Materials, Rune Stones, or Crafting Essences—are dropped more frequently, allowing players to improve and upgrade their items more efficiently. This could make the difference between reaching the endgame with subpar gear or having powerful items that make you a force to be reckoned with.

              4. Unique Event Bonuses

              What makes this event even more thrilling is that Blizzard has teased the possibility of unique event bonuses. This could involve special loot chests that spawn after significant achievements or activities, such as defeating certain bosses or clearing a series of world events. The loot from these chests could range from rare crafting materials to exclusive cosmetics or items that can’t be found in the regular game, adding an extra layer of excitement for players looking for something special during this event.

              How to Make the Most Out of the Loot Event

              With so many potential rewards on the line, you’ll want to make sure you maximize your efforts during the surprise loot event. Here are some tips and strategies to ensure you get the most out of this limited-time opportunity:

              1. Focus on High-Tier Activities

              While loot can drop from almost any source during the event, elite encounters, world bosses, and high-level dungeons offer the best chances of rare loot drops. Focus on completing these more difficult challenges, as they will have a higher probability of rewarding you with the best items. For example, dungeons are often packed with powerful enemies, and clearing them in a group may offer additional rewards that are significantly more valuable than those found in regular mob kills.

              2. Participate in Group Play

              The surprise loot event encourages group activities, as group dungeons, raids, and world events offer significantly higher chances of legendary drops and crafting materials. If you’re not already in a guild or a dedicated group, now might be the perfect time to team up with other players. Coordinating efforts to defeat challenging bosses or completing objectives will improve your chances of scoring big during the event.

              3. Use Loot Filters and Item Comparisons

              With the increased loot drop rate, your inventory is going to fill up quickly. Make sure you’re using loot filters to help prioritize cheap Diablo 4 Items that fit your character’s build or are needed for upgrades. You don’t want to be overwhelmed by low-tier items that can be easily replaced. Prioritize legendary and set items, as well as crafting materials, so that you can make the most efficient use of your loot drops.

              4. Time Your Farming Sessions

              Like any event, timing can be crucial to your success. Since this is a limited-time event, you’ll want to carve out a few long gaming sessions to take full advantage of the increased loot drop rates. Plan to tackle the most challenging content during the event’s peak hours, ensuring that you maximize your rewards during the event’s active periods.

              The Community’s Reaction

              As expected, the announcement of this surprise loot event has generated an immense amount of excitement within the Diablo 4 community. Players who had been grinding for specific loot or struggling to gather enough crafting materials are thrilled about the extra opportunities to improve their characters. The community has been abuzz with discussions on how to best capitalize on the event’s rewards, and many have shared their success stories on social media and forums.

              The event has also brought renewed interest in the game, with players who might have taken a break from Diablo 4 returning to experience the increased loot and the chance to progress faster. The surprise loot event has proven to be an effective way for Blizzard to engage its community and create excitement around a game that already has a passionate and dedicated player base.

              Conclusion: Why You Shouldn’t Miss Out

              The Diablo 4 surprise loot event is one of the many ways that Blizzard continues to keep the game fresh and exciting. By offering increased loot drop rates, legendary items, crafting materials, and exclusive rewards, the event provides players with a golden opportunity to level up their characters and progress faster than ever before. Whether you’re a seasoned Diablo veteran or a newcomer, this surprise loot event is one you won’t want to miss.

              So, grab your weapons, rally your friends, and dive back into the world of Sanctuary. The loot is waiting, and the rewards are yours for the taking—if you’re ready for the challenge.

              OSRS Fletching Guide:Why This Skill Deserves Your Attention

              OSRS Fletching Guide:Why This Skill Deserves Your Attention

              In the ever-expanding world of Old School RuneScape, players are constantly leveling skills to gain an edge in combat, make gold, or unlock new content. One skill that often gets overshadowed by flashier mechanics is Fletching—but don’t let its simplicity fool you. Whether you’re a seasoned archer, a money-hungry skiller, or a multitasking master, Fletching offers a surprising amount of value.

              This guide will walk you through why Fletching is worth training, how it supports your ranged build, how it can fill your coffers, and how to integrate it seamlessly into your broader gameplay.

              Fletching allows players to create ranged ammunition and weapons, from humble bronze arrows to powerful rune bolts. If you’re relying on ranged combat, having a personal ammo supply is a game-changer.

              Here’s what you can make:

              Arrows (Bronze to Rune): Essential for bows; each tier deals more damage and increases accuracy.

              Bolts: Used with crossbows, especially deadly when enchanted.

              Throwing Weapons: Javelins, darts, and knives for high-speed training or tactical combat.

              Crafting your own ammo saves gold and lets you prep for fights on your own terms—no Grand Exchange runs needed. Your adventure awaits you – buy OSRS gold with RSgoldfast and conquer new challenges!

              Fletching = Easy Profits

              Fletching isn’t just about self-sufficiency—it’s also one of the most consistent money-making skills in the game.

              Ways to Profit:

              Sell Ammo on the GE

              Players constantly need arrows, bolts, and darts for training. High-tier ammunition like rune arrows and broad bolts often fetch solid prices.

              Make Headless Arrows

              An easy and fast method for beginners. These sell quickly and are often used by other players to train Fletching themselves.

              Craft and Sell Specialty Items

              Once you’re at higher levels, enchanted bolts and rune-tier gear can bring in serious gold, especially after updates or meta shifts.

              Fletch Bows for XP + GP

              Turning logs into longbows or shortbows—especially Yew or Magic—can yield both experience and cash. Add stringing to the mix for bonus profit.

              Fletching Is Perfect for Multitasking

              One of Fletching strongest features? It’s incredibly low-intensity. You can train it practically anywhere, often while doing other tasks.

              Smart Ways to Multitrain:

              Agility Courses – Fletch between laps to squeeze in extra XP.

              Farming Runs – Kill time between patches by crafting arrows or bows.

              Quest Downtime – Keep progressing even while reading dialogue or running across the map.

              Combat Prep – Make your own ammo as you gear up for Slayer tasks or bossing.

              Few skills offer this level of flexibility, making Fletching a no-brainer for efficiency-minded players.

              Fast, Flexible, and Satisfying

              Fletching is one of the fastest 99s in the game—and it can be cheap, profitable, or even free depending on your method.

              Want speed? Spam darts.

              Want GP? Fletch bows to sell or alch.

              On a budget? Headless arrows will do the trick.

              No matter your style, there’s a method to match your goals.

              Ideal for Ironmen and Completionists

              If you’re playing an Ironman, Fletching becomes essential. Without the GE, crafting your own arrows and bolts is mandatory for progression, especially during Slayer tasks, boss fights, and questing.Don’t let gold grinding slow you down – get cheap RS gold instantly at unbeatable prices, only at RSgoldfast!

              And if you’re chasing max stats or full completionist status, Fletching is one of the more pleasant and profitable grinds on the way.

              Training Fletching in OSRS is far more than a means to an end. It’s a smart investment in your account that helps you stay stocked, make money, and train effectively—all with minimal effort.

              Whether you’re a PvM addict, a casual skiller, or a hardcore Ironman, adding Fletching to your rotation is one of the best decisions you can make.