OSRS F2P Fishing Guide: Mastering the Art of Angling

OSRS F2P Fishing Guide: Mastering the Art of Angling

Fishing is a beloved skill in Old School RuneScape (OSRS) that allows players to reel in a vast array of fish for sustenance or use in other skills like Cooking and Herblore. Whether you’re a neophyte or a seasoned veteran, this comprehensive guide will illuminate the world of free-to-play (F2P) fishing training methods in OSRS, ensuring that you become a master angler in no time.

Getting Started: The Foundations of Fishing
Before delving into the various training methods, it’s crucial to grasp the fundamentals of fishing in OSRS. To embark on your piscatorial journey, you will require a fishing tool, such as a fishing net, small fishing rod, or fly fishing rod. Additionally, certain methods necessitate bait or feathers. Fishing spots are generously scattered across the game world, each harboring different types of fish.

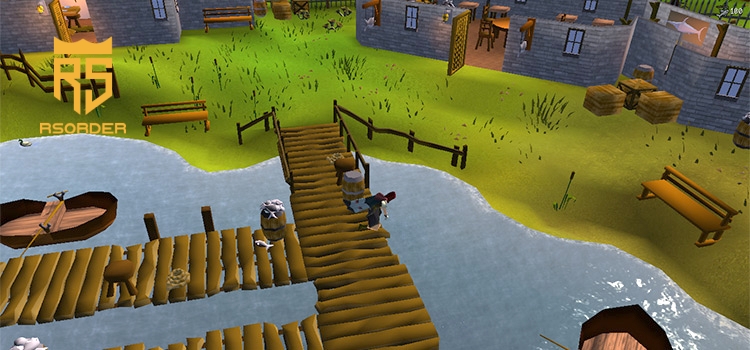
To commence your fishing endeavors, locate a fishing spot, click on it, and watch as your character casts their line. The fish you can catch and the available fishing spots are determined by your Fishing skill level.

Training Methods Unveiled

Shrimp and Anchovies (Levels 1-15)
In the early stages, your aim should be to net shrimp and anchovies. Both can be caught in either Al Kharid or Draynor Village using a small fishing net. Though progress may seem slow at first, it won’t be long before you reach level 15.

Trout and Salmon (Levels 15-58)
Once you attain level 15, it’s time to switch to fly fishing. Journey to either Lumbridge or Barbarian Village armed with a fly fishing rod and feathers. Catching trout and salmon proves more efficient and offers superior experience rates compared to the previous method.

Lobsters (Levels 40-99)
Upon reaching level 40, the realm of lobster fishing unlocks. You can find these delectable crustaceans at Musa Point in Karamja. Lobster fishing provides decent experience rates and can even serve as a profitable venture in F2P.

Swordfish and Tuna (Levels 50-99)
Starting at level 50, you can reel in swordfish and tuna. These prized catches inhabit the same fishing spot as lobsters. Not only do swordfish and tuna offer even better experience rates than lobsters, but their desirability makes them a sought-after catch amongst anglers.

Fishing Guild (Levels 68-99)
Once you achieve level 68, the Fishing Guild’s gates swing open, welcoming you to a haven of enhanced experience rates and a diverse selection of fish, including the coveted sharks. Situated west of Hemenster, the Fishing Guild is a destination that befits your mastery of the angling arts.

In your pursuit of piscine perfection, there are a few additional tips to bear in mind:

Utilize fishing potions: Fishing potions temporarily boost your Fishing level, enabling you to catch higher-level fish and accelerating your training progress.
Equip fishing gloves: Obtained from the Fist of Guthix mini-game, fishing gloves provide a modest experience boost when worn. They serve as a valuable accessory for any aspiring fisherman.
Consider cooking your catch: Cooking the fish you catch not only grants Cooking experience but also produces a source of sustenance. This can be especially useful during combat or when embarking on extended adventures.
OSRS Gold: Can be used to purchase a wide range of items, supplies, equipment, and services within the game, which makes buying cheap RuneScape Gold from RSorder very helpful for your fishing trip

With this comprehensive guide in your tackle box, you possess the knowledge necessary to conquer the vast seas and bountiful rivers of OSRS F2P fishing. Cast your line, reel in those catches, and watch as your Fishing skill soars to new heights. May your angling endeavors be fruitful and your journeys on the water be filled with excitement and adventure!

Decoding FC 24 Max 89 Icon Upgrade SBC: Unveiling the Best and Less Desirable Rewards

Decoding FC 24 Max 89 Icon Upgrade SBC: Unveiling the Best and Less Desirable Rewards

The EA FC 24 Max 89 Icon Upgrade SBC introduces an intriguing proposition in the realm of Ultimate Team, promising a new base Icon card to those who successfully complete the associated tasks. While the rewards are expansive, the ultimate quality of the bestowed items hinges on the whims of luck. This SBC boasts an array of potential outcomes, ranging from stellar additions to your squad to less desirable acquisitions. Let’s delve into the best and worst players one might secure upon completing the EA FC 24 Max 89 Icon Upgrade SBC.

Best EA FC 24 Max 89 Icon Upgrade SBC Players

Given the SBC’s cap at 89-rated icons, some rewards stand out as exceptional additions, far surpassing the completion cost of 160,000 FC 24 coins. The following six players, each valued significantly above the million-coin mark, represent the cream of the crop:

Jairzinho: Holding the highest market value among the options, Jairzinho is a standout choice.

Patrick Vieira: A favorite among professional players, Vieira's in-game performance makes him a prized acquisition.

Samuel Eto'o: Known for his prolific goal-scoring abilities, Eto'o adds firepower to any squad.

Franck Ribery: A versatile and dynamic player, Ribery brings flair and creativity to the pitch.

Eric Cantona: Revered for his iconic status, Cantona is not only a football legend but a valuable asset in the game.

Kenny Dalglish: An iconic figure, Dalglish is celebrated for his goal-scoring prowess and overall impact on the pitch.

These six players are the crème de la crème, presenting a tremendous value proposition considering their exorbitant market prices.

Worst EA FC 24 Max 89 Icon Upgrade SBC Players

The reward pool also includes 88 and 89-rated items, but it’s not without its pitfalls. Some players with overalls of 86 come into play, and their market values are notably lower, diminishing the overall value proposition of the SBC. Here are the less desirable options:

Roy Keane: While a notable figure in football, Keane's market value doesn't align with the completion cost of the SBC.

Gennaro Gattuso: Known for his tenacity, Gattuso's market value falls short of justifying the SBC investment.

Ian Rush: A legendary striker, Rush's market value doesn't match the potential cost of the SBC.

David Trezeguet: Despite his goal-scoring prowess, Trezeguet's market value doesn't make the SBC enticing.

Davor Suker: A Croatian football legend, Suker's market value doesn't reflect a favorable return on investment.

Hernan Crespo: While a respected name, Crespo's market value doesn't align with the SBC cost.

It’s crucial to note that the outcome of the SBC is beyond the player’s control, introducing an element of risk. While the potential to land an exceptional icon exists, the unpredictability of the reward makes it a gamble. Nonetheless, the allure lies in the chance to secure one of the premier icon cards listed above, balancing the risk and reward for those embarking on the EA FC 24 Max 89 Icon Upgrade SBC.

New World should consider enhancing self-healing abilities

New World should consider enhancing self-healing abilities

New World should consider enhancing self-healing abilities while reducing the effectiveness of incoming heals from healers. This approach would transform healers into true support players, capable of tipping the balance in a fight without rendering it impossible for players without a dedicated healer. It would shift the focus of healers from being mandatory babysitters to providing utility through their secondary weapons.

In my opinion, the primary role of healers is to support players, making strategic decisions about whom to support, heal, or allocate resources to, based on their value to the team. However, the current state of healing allows even mediocre players, who miss dodges and make mistakes, to survive. Healers should empower skilled players rather than acting as a lifeline for less capable ones.

Wars:

In War battles, healers are considered essential, but with adjustments, such as reducing incoming heals and boosting self-healing in proportion, healers would remain indispensable even in large-scale battles. However, this change would raise the skill ceiling for other players, as they would need to rely more on their own sustainability.

Outpost Rush (OPR):

This proposed change would foster greater independence among players, which could help counter the prevailing ranged meta that still dominates OPR. While the developers have mentioned that bruisers have high win rates in OPR, it’s important to note that winning isn’t the sole focus of OPR. It’s a PvP mode characterized by semi-structured gameplay, class imbalances, and limited means for teams to organize effectively, particularly when certain player types are absent (e.g., a team lacking a healer).

Arenas:

In current Arena matches, facing a Fire Mage without a healer can be frustrating, given the overwhelming win rates of Fire Staff users. The absence of healing options means that players cannot recover from one or two hits by a Fire Mage. These mages can continuously use ranged skills, deploy pylons, walls, and slows, making it challenging to heal sufficiently or maneuver around them.

The suggested changes do not aim to make players invincible or immune to ranged attacks. Instead, they seek to address the issue of healers being mandatory rather than support players. This would provide players without healers, particularly light melee characters, with the tools needed to counter ranged opponents more effectively. Of course, it’s also important to know how to balance the gap between the characters with New World GOLD, so I hope to keep improving the gameplay experience, thanks.

Path of Exile: The Bone Shatter Juggernaut Build

Path of Exile: The Bone Shatter Juggernaut Build

Welcome to another comprehensive build guide for Path of Exile, and this time, we’re diving into the world of the Bone Shatter Juggernaut. But before we get into the nitty-gritty details, let me be clear: this build is not for the faint of heart. It’s a powerful and fast-paced build that requires a good understanding of crafting to truly excel. If you’re ready to embark on a bone-crushing journey, then read on.

The Bone Shatter Juggernaut

The Bone Shatter Juggernaut is not your run-of-the-mill build. It offers incredible damage output but comes with its unique challenges. Unlike most builds where damage scales with gem levels, in the Bone Shatter build, you’ll need to focus on upgrading your weapon to maximize your potential. This can be intimidating for new players, especially if you’re not comfortable with crafting.

A downside of this build is that it may fall short in dealing with Uber Elder and other high-level bosses. It excels in most content but may require a different setup for tackling the toughest challenges. However, the Bone Shatter Juggernaut truly shines in races and offers a fantastic leveling experience. If you’re up for the challenge, keep reading.

Leveling and Playstyle

Let’s kick things off with leveling. As you begin your journey, use Ground Slam to clear through early content. To make things more straightforward, we’ll group your skills into different skill sets. This approach will help you avoid clutter and confusion and keep you on track.

At level 12, switch to Sunder for faster and more efficient clearing. Your primary playstyle will involve moving around and right-clicking on monsters. This build utilizes two totems: Ancestral Protector and Ancestral Warchief. Both totems provide essential buffs, so keeping them active is crucial for optimal performance. However, be prepared for boss fights as they may take out your totems, causing a noticeable dip in your damage output. To bolster your damage, you have access to the Berserk skill, which leverages your rage for significant damage boosts.

One important tip to remember: be cautious when you come across acceleration shrines or echoing shrines. Triggering them can lead to self-inflicted harm due to the excessive accumulation of rage. This is particularly crucial if you’re playing in Hardcore mode.

In combat, remember to keep moving around the boss, as standing still can lead to unnecessary damage. While this build is quite tanky, it’s always wise to maintain some level of movement during battles.

Key Components and Gem Links

Now, let’s delve into the key components and gem links that make the Bone Shatter Juggernaut tick. First and foremost, Path of Building (PoB) is an invaluable tool for optimizing your build. If you’re new to PoB, there are tutorials available to help you get started. It’s an excellent resource for planning your character and understanding the specifics of your setup or Even the use of Path Of Exile Currency.

For gem links, here are the essentials:

  • Path of Building: PoB helps you plan and visualize your character’s progression.
  • Ground Slam (Early Leveling): Use Ground Slam for efficient early game clearing.
  • Sunder (Level 12+): Once you hit level 12, switch to Sunder for faster progress.
  • Ancestral Protector and Ancestral Warchief Totems: These totems are vital for providing buffs and enhancing your damage output.
  • Berserk: Utilize Berserk to tap into your rage for increased damage.

The Ascendancy choices play a significant role in this build. The Juggernaut Ascendancy provides a tremendous boost to your tankiness and overall survivability. Key benefits include increased resistance, added defense, and immunity to certain detrimental effects.

Crafting and Gear

Crafting plays a pivotal role in the Bone Shatter Juggernaut build. The quality of your weapon is paramount. Your primary focus should be on upgrading your weapon, enhancing your physical damage, and optimizing your attack speed.

Here are some tips for crafting and gearing:

  • Upgrading Your Weapon: Your weapon’s physical damage is of paramount importance. Focus on getting a weapon with high flat physical damage and the right attack speed. Remember to consult Path of Building for DPS calculations.
  • Crafting Resists: Early on, prioritize crafting resistance on your gear to ensure you can tackle higher-level content without succumbing to elemental damage. This is especially important for Hardcore players.
  • Gear Priorities: Your gear should prioritize Life, Resistance, and Physical Damage. Look for items that help you achieve a balance between these three aspects.
  • Crafting Bench: The crafting bench is a powerful tool. Don’t forget that you can craft resistances on white items. Use this to your advantage when optimizing your gear.

Defense and Utility

The Bone Shatter Juggernaut offers robust defenses, primarily due to the Juggernaut Ascendancy and gear choices. In particular, the recent addition of the “15% increased maximum Life if no life modifiers on equip Body Armor” modifier is incredibly valuable. It allows you to stack armor without worrying about life modifiers, resulting in a significantly enhanced defense. Remember, this bonus doubles due to the Juggernaut Ascendancy, making it a formidable defensive tool.

Additionally, jewels can significantly impact your character’s performance. Look for jewels that provide physical attack damage, increase maximum Life, and reduce Mana’s cost. This combination helps maintain your Mana pool, which is critical for sustaining your skills.

Advanced Crafting Tips

Crafting the perfect weapon is crucial for this build. Here are some advanced crafting tips to help you optimize your weapon:

  • Essence Crafting: Using Essences, such as Deafening Essences, can yield excellent results. Look for hybrid or high-flat physical damage rolls.
  • Alteration Spam: While not recommended due to the value of Alteration Orbs for other purposes, you can try your luck with alteration spamming for high-tier physical damage rolls.
  • Harvest Crafting: Harvest offers another viable option for crafting powerful weapons. Reforge Physical and Augment Physical can be used to target desirable modifiers.

Parting Thoughts

The Bone Shatter Juggernaut build is a formidable choice for experienced Path of Exile players who enjoy high damage output and crafting intricacies. It excels in most content, including races, and can provide a thrilling and rewarding experience.

Remember to keep leveling and playstyle tips in mind as you progress. Utilize the key components and gem links suggested in this guide to maximize your potential. Focus on crafting the perfect weapon, and don’t hesitate to delve into advanced crafting techniques to fine-tune your character.

Path of Exile offers endless possibilities for character builds, and the Bone Shatter Juggernaut is a testament to the game’s complexity and depth. Whether you’re new to PoE or a seasoned veteran, the Bone Shatter Juggernaut is a build that can challenge and reward you in equal measure. So, embrace the bone-crushing power and embark on your journey through Wraeclast!

For more guides and all the latest news about Path Of Exile, check out MMOexp.com. You can also enjoy buying cheap POE Exalted/Chaos Orbs service here.

WoW WOTLK Classic: Making WOTLK Gold Guide

WoW WOTLK Classic: Making WOTLK Gold Guide

It’s been a while since I delved into the world of Wrath of the Lich King (WOTLK) Classic, but today, I want to take you on a journey through this classic expansion and share my insights on the economic side of the game. Making gold in WoW Classic has been a passion of mine since the expansion’s release, and I’ve been revisiting this world recently. In this article, I’ll discuss the items I’m buying, and what I’m selling, and provide some tips on how to increase your investment portfolio. So, sit back, relax, and let’s explore how to make WOTLK gold in Wrath of the Lich King Classic.

Building My Investment Portfolio

Over the past few weeks, I’ve been working on building my investment portfolio in WOTLK Classic, taking my starting value of 370,000 gold to an impressive 606,000 gold. Now, let’s dive into the items I’ve been selling to increase my capital and what strategies I’ve been using to make gold in this classic expansion.

Selling Strategies

Thornscale Basilisk’s Eyes: One of my go-to gold-making strategies has been selling Thornscale Basilisk’s Eyes. These valuable items can be farmed efficiently, making them a consistent source of income. I’ve been stockpiling them and selling them whenever the prices are right, ensuring a steady flow of gold into my pocket.

Leaping Hatchlings: Leaping Hatchlings are a quick and easy way to make gold. You can log in once or twice a day to farm them, making up to 450 gold in just a few seconds. I’ve been incorporating this into my daily routine, logging in during breakfast to maximize my earnings.

Pristine Black Diamonds: Pristine Black Diamonds have also been a part of my selling strategy. These gems can fetch a decent price, and I’ve been making a tidy profit by selling them when the market is favorable.

Righteous Orbs: Righteous Orbs are another item that I’ve been selling. Keep an eye on their prices, as they can fluctuate, and I’ve even managed to sell some for as much as 40 gold each.

Golden Pearls: Golden Pearls have been selling like hotcakes for me, consistently fetching good prices. These pearls can be a great source of income, so keep an eye on the market for opportunities.

Flame Caps: I bought a bunch of Flame Caps when they were undervalued due to a Nerf. With their value rising significantly in just a few months, I’ve made substantial profits by selling them. Keep an eye on market trends and capitalize on opportunities like these.

Frozen Orbs: While prices for Frozen Orbs can be somewhat erratic, I’ve been selling them when they’re profitable, making sure to capitalize on upward trends.

Titansteel Bars: Titansteel Bars have been a part of my portfolio, although they weren’t as profitable as some other items. Nevertheless, I’ve made a small profit by selling them when the prices were right.

Incorporating Investment in Phase 4

Phase 4 of WOTLK Classic is on the horizon and has already been determined, providing a glimpse into what’s coming next. As we’re approaching this new phase, I’ve started selling my Phase 3 investments, even though the phase hasn’t been officially released. The key is to start selling when items are profitable rather than waiting for one big payday. Prices can fluctuate daily, and selling items continuously allows you to maximize your profits and avoid missing out on opportunities.

Conclusion

In Wrath of the Lich King Classic, making gold requires careful planning, market awareness, and a willingness to adapt to changing circumstances. By consistently selling items that are currently profitable and staying informed about market trends, you can steadily build your investment portfolio and increase your gold reserves. The key to success is not just making gold but knowing when to spend it wisely on future investments. As we go through the Classic expansion, I hope this guide sheds some light on the art of crafting WoW WOTLK Classic gold and inspires you on your own path to wealth.