How to Earn the House of the Ungwana Trophy in Skull and Bones

How to Earn the House of the Ungwana Trophy in Skull and Bones

In the dangerous and treasure-filled seas of Skull and Bones, unlocking achievements isn’t just about bragging rights—they often guide players toward valuable discoveries and strategic opportunities. One such achievement is the House of the Ungwana trophy, which centers around the powerful Ungwana Confederacy and its capital, Jiwe.

While Jiwe isn’t a fully explorable city you can dock at, it’s still a hotspot for rare resources and trade opportunities. If you’re aiming to snag this trophy and gain a foothold in Ungwana territory, here’s everything you need to know.

What Is the House of the Ungwana Trophy?

This trophy marks your interaction with Jiwe, the political and economic heart of the Ungwana Confederacy. It’s an achievement tied to exploration rather than combat, rewarding you for reaching and observing this major settlement—even from a distance.

How to Unlock the Trophy

Unlocking the House of the Ungwana trophy is simple once you know where to go and what to do. Follow these steps:

1.Set Sail Toward Jiwe

    Jiwe is marked on your map, but you won’t be able to dock there like in other ports. Instead, sail close to the island’s main entrance. Approach carefully, especially if you’re navigating through hostile waters.

    2.Use Your Telescope

      When you’re within range of Jiwe, equip your spyglass and aim it at the island’s entrance. This act of discovery is often enough to trigger the trophy. Make sure you’re properly lined up with the gate or landmark the game recognizes.

      3.Interact from Up Close (Optional)

        For a more hands-on approach, you can sail directly up to the Jiwe harbor and interact with its main point of interest. Just follow the on-screen prompt to trigger the interaction and unlock the trophy.

        Beyond the achievement, Jiwe offers compelling reasons to drop anchor nearby—even if you can’t set foot on the land itself.

        Unique Trade Opportunities

        Jiwe’s merchants often sell exclusive goods not found in common ports like Sainte-Anne. This makes it a lucrative location for picking up rare items and materials crucial for crafting and fulfilling contracts.Every great pirate needs the right tools – get your Skull and Bones Items with MMOexp today!

        Rare Resource Gathering

        Jiwe is surrounded by resource-rich waters. One standout material is hemp, which is essential for crafting upgrades. If your tools are leveled up, you’ll harvest more efficiently, stocking up for future ship improvements and gear.

        NPC Interactions and Contracts

        Even though you can’t explore the city, nearby NPCs and ships often provide hints about faction contracts, quests, and events related to the Ungwana Confederacy. Keep an ear out for chatter that might open up new gameplay paths.

        To make the most of your trip to Jiwe, keep these strategies in mind:

        Upgrade Your Telescope: A higher-tier spyglass gives better range and clarity, making it easier to unlock the trophy from afar.

        Prepare Your Ship: Ensure you’re well-supplied in case of ambushes. Jiwe’s waters can be contested by rival factions and NPC pirates.

        Plot Your Route: Plan your sailing path to avoid unnecessary conflict or delays.

        Stay for the Side Content: Stick around to trade or gather resources—it’s a smart way to combine achievement hunting with useful progress.

        Unlocking the House of the Ungwana trophy is more than just a checkbox—it’s a gateway into the vibrant world of the Ungwana Confederacy. While you can’t dock at Jiwe, approaching and observing it opens the door to valuable trades, rare resources, and deeper connections with this major faction.Unleash your full potential – buy Skull and Bones Silver with MMOexp now and dominate the seas!

        So chart your course, ready your sails, and set your sights on Jiwe. Whether you’re a seasoned pirate or a newcomer to the seas, this achievement is a rewarding step in your Skull and Bones journey.

        Mmoexp Elder Scrolls Online: New Content Pass Introduces Much-Needed Changes

        Mmoexp Elder Scrolls Online: New Content Pass Introduces Much-Needed Changes

        The introduction of the new Content Pass structure in The Elder Scrolls Online is one of the most impactful changes to hit the game in years, especially after its long-standing pattern of predictable, formulaic releases. For many longtime players like you, this shift feels like a breath of fresh air in a game that, while rich in lore and design, had settled into a repetitive rhythm.

        What’s Different About the Content Pass?

        Instead of the rigid four-update cycle (two dungeons, one chapter/expansion, and a story epilogue), the Content Pass offers a more fluid and engaging content stream, focused less on monetization per update and more on delivering evolving experiences. Here’s what makes it exciting:

        1. Content Variety & Flexibility

        Bethesda has promised dynamic content drops: story arcs, events, mini-expansions, and PvP/PvE systems can now be released outside the usual cycle.

        This gives devs more room to experiment with mechanics, such as subclassing in Update 46, without needing to fit into a rigid yearly plan.

        2. Player-First Design

        The monetization fatigue you described- where content felt piecemealed and paywalled being addressed.

        Content Pass owners now get rolling access to future content, minimizing the need to keep buying chapters or DLCs separately.

        3. Improved Engagement

        Each content drop feels more like an event rather than just another checkbox.

        Bethesda hopes this will reinvigorate both longtime fans and lapsed players by avoiding burnout and offering something truly new each time.

        Why This Matters

        For a game that just hit its 10-year milestone, such a structural shift is not just bold- it’s necessary. It means Bethesda recognizes the need to:

        Retain its core community,

        Modernize delivery,

        And give ESO a second wind in a saturated MMO market.

        Final Thoughts

        The Content Pass might not be the sweeping overhaul of gameplay systems you imagined, but in terms of player experience and how you consume content, it’s the most promising evolution in years. If it delivers as intended, it could redefine what the next decade of The Elder Scrolls Online looks like.

        The Elder Scrolls Online is heading into a transformative era-and whether you’re a long-time adventurer or just returning to Tamriel, having ESO Gold on hand is a smart move.

        Pit of the Artificers Guide – Diablo 4 Ultimate Guide

        Pit of the Artificers Guide – Diablo 4 Ultimate Guide

        The Pit of the Artificers is one of the most exciting and challenging dungeons in Diablo 4, a dark and atmospheric locale filled with powerful enemies, intricate mechanics, and epic loot. As players venture through the Pit, they will face off against a variety of formidable foes while uncovering the secrets of the dungeon’s design, origin, and purpose. For players seeking a comprehensive guide to conquering this treacherous dungeon, this article covers everything you need to know: from dungeon mechanics to strategies, enemy encounters, and tips on optimizing your experience in the Pit of the Artificers.

        Overview of the Pit of the Artificers

        Located deep within the world of Sanctuary, the Pit of the Artificers is a key dungeon in Diablo 4, offering an intense challenge for players seeking high-level content. The dungeon is part of the game’s vast, interconnected world, nestled within a complex series of areas that tie into the game’s lore.

        This dungeon is not just a simple cavern but an area designed with intricate traps, mechanical enemies, and puzzles to test both the player’s combat skills and their ability to adapt to environmental challenges. It’s a great place to farm for powerful loot, rare crafting Diablo 4 materials, and seasonal objectives. As part of Diablo 4’s post-launch content, the Pit of the Artificers is especially attractive for players who want to test their builds and prepare for some of the most difficult challenges the game has to offer.

        Key Features of the Pit of the Artificers

        Before diving into the specifics of how to conquer the dungeon, let’s take a closer look at what makes the Pit of the Artificers unique:

        Mechanical Environment: The dungeon’s layout is a testament to ancient artificers who have long since vanished but left behind a legacy of deadly traps, mechanical monsters, and powerful devices. The environment is filled with technology-based traps and obstacles that can either assist or harm the player, making combat and navigation particularly tricky.

        Puzzle Mechanics: Unlike many other Diablo 4 dungeons, the Pit features environmental puzzles that players must solve in order to proceed. These puzzles involve manipulating levers, activating mechanisms, and managing pressure plates that control the flow of the dungeon’s energy. Time management and careful observation are essential for success.

        Challenging Enemies: Expect to face off against a variety of formidable mechanical enemies, including automatons, clockwork beasts, and other creations that test your combat tactics. These enemies often have unique resistances and attack patterns that force players to rethink their usual strategies.

        High-Value Loot: The Pit of the Artificers is a rich source of loot, including legendary items, crafting materials, and rare drops. It’s one of the best places in Diablo 4 to farm for high-end gear, making it a must-visit for those who are looking to optimize their builds.

        End-Game Content: As part of the game’s endgame content, this dungeon scales in difficulty, offering players the chance to adjust to higher levels of challenge. This is ideal for players who have already reached the max level and are looking for tougher experiences.

        Dungeon Mechanics and Layout

        The Pit of the Artificers dungeon is characterized by a multi-layered layout, consisting of several interconnected chambers, each with its own set of traps, enemies, and environmental puzzles. Here’s a breakdown of what you can expect as you progress through the dungeon:

        1. Initial Entry – The Machine’s Heart

        As you begin your journey into the Pit, you will encounter the first layer, which is mostly comprised of a large mechanical chamber full of rotating gears, pressure plates, and ancient machinery. These are the key environmental hazards in this area.

        Mechanism Traps: Pay attention to the constantly shifting gears and pressure plates. Some of these traps will open up pathways, while others might trigger a deadly set of mechanical spikes or shooting blades.

        Puzzle Element: In certain rooms, you’ll need to activate switches to deactivate some traps or reveal hidden paths. These puzzles can be complex, requiring players to time their actions perfectly or coordinate multiple levers and buttons to progress.

        2. The Depths – A Labyrinth of Steel

        After getting through the initial traps, you’ll enter the second layer: the Depths. This area has a labyrinthine structure, with corridors, vertical shafts, and rooms filled with automated enemies. It’s a maze that forces players to pay attention to the details of the dungeon’s layout and use their map for guidance.

        Clockwork Enemies: The Depths are populated with clockwork enemies, such as Mechanical Golems and Automaton Sentries. These foes have a variety of abilities, such as summoning mechanical minions, using elemental-based attacks, or deploying traps to entrap the player.

        Environmental Hazards: Be wary of pressure plates, laser beams, and electrified floors. In many cases, you will need to defeat enemies to gain access to key areas or activate specific mechanisms to proceed.

        3. The Core – Heart of the Artificers’ Creation

        At the deepest level lies the Core, where the true heart of the artificers’ technology lies. This area is a towering chamber filled with the most difficult puzzles and dangerous enemies.

        Boss Fight Setup: The final area leads to a series of boss fights, with each room containing various stages of the mechanical monstrosities that the artificers created. These bosses have devastating attacks and require strategic thinking to defeat.

        Energy Manipulation: Players will need to manipulate energy flows and activate specific nodes in the Core to weaken the boss or disable protective barriers. These puzzles often involve precise timing and working with the dungeon’s mechanics to expose weaknesses in the bosses.

        Boss Encounters in the Pit of the Artificers

        The Pit of the Artificers contains several challenging bosses, each with unique mechanics and abilities. Let’s take a closer look at the most notable bosses you’ll face.

        1. The Gearsmith

        The first boss you’ll encounter is The Gearsmith, a giant mechanical creature that was once a revered artificer. The Gearsmith can control the dungeon’s mechanical systems and will use them to launch devastating attacks at you.

        Abilities: The Gearsmith can summon mechanical minions, deploy energy blasts, and create walls of rotating gears that damage players who stand too close. Players need to be agile and avoid these traps while managing the adds.

        Strategy: Keep an eye on the floor to avoid getting caught in traps, and make sure to focus on disabling the minions before dealing with The Gearsmith itself.

        2. The Clockwork Warden

        The Clockwork Warden is a large construct powered by elemental energy. It can unleash a series of devastating shockwaves that disrupt the players’ positioning. It also has the ability to summon mechanical constructs to aid it in combat.

        Abilities: The Clockwork Warden can generate large electrical storms that cover a wide area, forcing players to constantly move and reposition. It can also deploy clockwork golems that attack in sync with its movements.

        Strategy: Stay on the move to avoid being overwhelmed by electrical storms. Focus on defeating the clockwork golems before they can overwhelm you, and exploit the Warden’s cooldowns to land your attacks.

        3. The Architect

        The Architect is the final boss of the dungeon, the mastermind behind the creation of all the mechanical creatures and devices. This boss fight involves a series of phases, with each one introducing new mechanics that force players to think on their feet.

        Abilities: The Architect can summon mechanical constructs, deploy traps, and even shift the terrain, making the environment more hazardous. Its attacks can target multiple players and often come in quick succession, making it a battle of endurance as well as strategy.

        Strategy: The key to defeating The Architect is to stay patient and deal with its summoned constructs before focusing your attention on the boss. You will need to balance offense and defense while managing your positioning to avoid traps.

        Loot and Rewards

        The Pit of the Artificers is one of the best places in Diablo 4 to acquire high-quality loot. From legendary items to set pieces and crafting materials, the dungeon offers valuable rewards for those who successfully complete it.

        Legendary Gear: Expect to find items with powerful affixes, especially those suited for end-game builds. The bosses and chest drops in the Pit are particularly rewarding for players looking to optimize their character.

        Artificer’s Ingots: These are rare crafting materials dropped by enemies and bosses. These ingots can be used to craft or upgrade certain cheap Diablo 4 Items, making them highly sought after.

        Cosmetic Rewards: Completing the Pit of the Artificers may also reward players with exclusive cosmetics, including new skins, weapon appearances, and banners.

        Tips for Conquering the Pit of the Artificers

        Plan Your Build: Given the dungeon’s mechanics and the variety of enemy types, ensure that your build is optimized for both offense and defense. Consider having high mobility, crowd control abilities, and defensive cooldowns.

        Team Composition: If you’re going in with a group, make sure your party has a good mix of damage dealers, healers, and crowd control specialists. Communication is key in this dungeon.

        Avoid Environmental Hazards: The dungeon features numerous traps, so always be aware of your surroundings. Take note of areas that have rotating gears or energy beams that could harm you.

        Manage Your Resources: The final boss fight, The Architect, can be prolonged. Be mindful of your resources, including health potions, cooldowns, and energy levels.

        Adapt to the Mechanics: Each boss encounter has unique mechanics, so take the time to learn them. Patience and trial-and-error will help you succeed.

        Conclusion

        The Pit of the Artificers is one of the most rewarding yet challenging dungeons in Diablo 4, offering a blend of combat, puzzle-solving, and environmental mechanics that test the limits of players’ skills. By understanding the layout, boss encounters, and loot rewards, you can better prepare for what lies ahead. With the right strategy, a well-balanced build, and a solid team, you can overcome this dungeon’s challenges and claim the rewards it offers. Best of luck, and may your loot be legendary!

        Path of Exile 2 – Unlocking and Mastering Raging Soul

        Path of Exile 2 – Unlocking and Mastering Raging Soul

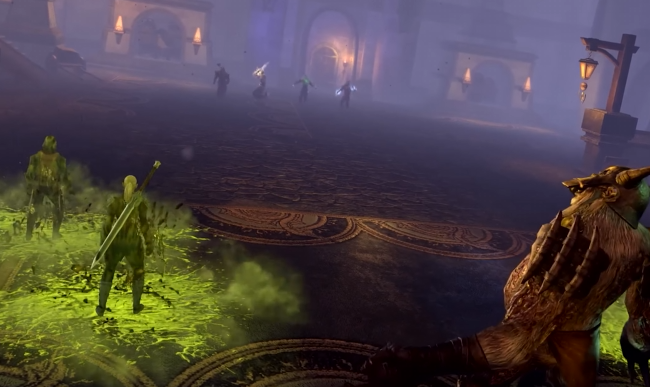
        Path of Exile 2 builds upon its predecessor with deeper systems, reimagined mechanics, and a host of new skill gems that support diverse and powerful builds. Among these additions is Raging Soul, a passive elemental buff that dramatically enhances the capabilities of spellcasters. Whether you’re playing as a Witch, Sorceress, or another Intelligence-based caster, Raging Soul can be a core component of your endgame setup.

        Raging Soul is a passive buff that enhances elemental spell damage, improving the power of your fire, cold, and lightning spells without the need for manual activation.Get the POE 2 Currency you need to thrive at MMOexp now! Once acquired and equipped, it remains active as long as your character meets its requirements, empowering your magic with no additional upkeep.

        Key Effects:

        Increases elemental damage output, including fire, cold, and lightning.

        Amplifies status effects like ignite, freeze, and shock applied by spells.

        Does not occupy an active skill slot, freeing up space on your hotbar and simplifying combat flow.

        This makes Raging Soul ideal for builds centered around elemental magic, especially those looking to scale spell damage efficiently.

        How to Unlock Raging Soul

        To gain access to Raging Soul, you must acquire the Uncut Soul Gem, a rare gem categorized under elemental enhancements. Here’s how you can obtain it:

        1.Boss Farming

          Many high-level bosses have a chance to drop rare gems, including the Uncut Soul Gem. Focus on:

          End-of-act bosses or world bosses.

          Bosses in special encounters, dungeons, or events with boosted loot tables.

          Party play for increased drop chances and faster clears.

          2.Chest Exploration

            Rare gems can occasionally be found in high-level chests, particularly in challenging zones or hidden areas. Use loot filters to highlight valuable items and explore thoroughly.

            3.Quest Rewards

              Some side quests offer Uncut Gems as rewards. Pay attention to quest details and choose wisely when selecting rewards.

              4.Trading

                If you prefer to avoid RNG, use the in-game trade system to obtain the Uncut Soul Gem from other players in exchange for currency or rare items.

                Requirements to Equip Raging Soul

                Before you can benefit from the buff, your character must meet specific criteria:

                Level 10 or higher

                30 Spirit (resource used for passive/active skills)

                25 Intelligence, aligning it with caster-focused builds

                Once these are met, simply equip the gem in your passive buff slot.

                Optimizing Your Build Around Raging Soul

                To get the most out of Raging Soul, your build should lean into elemental magic and status-based spellcasting. Here’s how to tailor your setup:

                1.Invest in Elemental and Spell Damage

                  Focus your passive tree and skill choices on:

                  +% Elemental Damage

                  +% Spell Damage

                  +% Status Effect Duration or Damage (ignite, freeze, shock)

                  2.Choose Complementary Spells

                    Use abilities that naturally benefit from elemental scaling. Some effective pairings include:

                    Fireball, Ice Nova, or Arc – classic spells with strong elemental identity

                    Shock Nova or Flame Surge – for combining AoE and status effects

                    Ignite/Freeze builds – to capitalize on Raging Soul’s synergy with elemental ailments

                    3.Gear and Stats

                      Look for equipment that boosts:

                      Intelligence, to increase base spellcasting effectiveness

                      Elemental Damage (global or spell-specific)

                      Critical Strike Chance for spells

                      Mana Regeneration, allowing for sustained spellcasting

                      4.Adapt to Enemy Types

                        Switch between elements based on the resistances of enemies:

                        Use cold or lightning against fire-resistant bosses.

                        Rotate spells depending on the elemental weaknesses of each encounter.

                        Combat Strategy with Raging Soul

                        Because Raging Soul is always active once equipped, it encourages aggressive, fast-paced spellcasting. You can:

                        Chain cast AoE spells to clear rooms quickly.

                        Apply status effects more reliably.

                        Pair it with high-uptime spells to maximize sustained damage output.

                        The passive nature of the buff also allows you to focus more on positioning, crowd control, or defensive layering without constantly reactivating skills.

                        Raging Soul is a cornerstone buff for any elemental caster in Path of Exile 2, offering a passive yet powerful enhancement to your magical arsenal. Once unlocked via the Uncut Soul Gem and integrated into your build, it enables you to scale elemental damage effortlessly and apply devastating status effects across the battlefield.

                        Whether you’re freezing foes in place, setting them ablaze, or shocking them into submission, Raging Soul ensures your spells hit harder and more consistently. Build around it, and you’ll unlock a whole new tier of power in your spellcaster journey.For even faster progress, grab affordable cheap POE 2 Orbs at MMOexp and enhance your experience today!

                        Elden Ring:Optimal Use of the Viridian Amber Medallion +3

                        Elden Ring:Optimal Use of the Viridian Amber Medallion +3

                        With the Viridian Amber Medallion +3 in hand, players can now begin to integrate this stamina-enhancing talisman into their builds. But simply equipping it isn’t enough; understanding how to synergize it with your playstyle, gear, and other talismans will unlock its full potential. Use MMOexp to acquire the Elden Ring Runes needed to conquer the lands between lands.

                        Tank Builds

                        Tanky characters who rely on heavy armor and large shields will benefit most from the medallion. Pair it with:

                        Bull-Goat Armor for top-tier poise

                        Erdtree’s Favor for extra HP and equip load

                        Green Turtle Talisman for increased stamina regen

                        This setup allows for prolonged blocking and sustained offense, making it ideal for boss fights or PvP encounters where trading blows is common.

                        Dexterity and Speed Builds

                        Quick, agile characters will find the medallion allows for more rolls, more sprinting, and longer combos. Ideal pairings include:

                        Raptor’s Black Feathers for enhanced jump attacks

                        Millicent’s Prosthesis for attack boosts on consecutive hits

                        Radagon’s Scarseal for increased strength and stagger potential

                        The increased stamina pool ensures you won’t gas out during drawn-out duels or while evading spell-casting foes.

                        Magic-Infused Hybrid Builds

                        Even hybrid or caster builds benefit from stamina—especially if you supplement sorcery with melee or use stamina-heavy spells. Pairing the medallion with:

                        Primal Glintstone Blade to reduce FP cost

                        Cerulean Amber Medallion for more FP

                        Magic Scorpion Charm to increase sorcery damage

                        …creates a resilient battlemage capable of long-lasting combat and consistent damage output.

                        PvP Strategy

                        In player-versus-player, stamina is often a deciding factor. A well-timed dodge, a flurry of chained attacks, or a guarded stance can turn the tide. The Viridian Amber Medallion +3 ensures you always have a stamina edge. Combine it with:

                        Quickstep or Bloodhound’s Step for evasive movement

                        Haligdrake Talisman to reduce Holy damage

                        Crimson Seed Talisman to boost healing from flasks

                        Mastering stamina in PvP means you can bait attacks, punish mistakes, and outlast opponents.Power up your builds, conquer bosses, and explore without limits – grab your buy Elden Ring Items at MMOexp today!

                        The Viridian Amber Medallion +3 isn’t just another amulet—it’s a cornerstone of endurance-focused builds across Elden Ring. Its powerful stamina boost is invaluable whether you’re exploring new DLC zones, facing off against colossal bosses, or dueling other Tarnished online. Understanding where to find it, how to survive the path to get it, and the best ways to use it will transform your playstyle and elevate your combat efficiency to new heights.