How to Obtain All of the Strongest Scorestreaks in Call of Duty:Black Ops 7 Zombies

How to Obtain All of the Strongest Scorestreaks in Call of Duty:Black Ops 7 Zombies

Surviving the relentless onslaught of Call of Duty:Black Ops 7 Zombies isn’t just about perks and Pack-a-Punch weapons anymore. Zombies mode now features eight unlockable Scorestreaks, each offering unique ways to control crowds, eliminate powerful enemies, or escape impossible situations during high rounds.

Black Ops 7 Zombies – Scorestreak Tier List

8.ARC-XD – Stylish Distraction with Low Durability

    Unlock Level:5
    Salvage Cost:1,000

    The ARC-XD deploys a remote-controlled vehicle that releases Aether shockwaves, pulling zombie attention and instantly killing weaker enemies caught in its pulses. While active, the player cannot take damage.

    Advantages:

    Excellent crowd distraction

    Invulnerability while piloting

    Boosts and jumps add mobility

    Drawbacks:

    Destroyed by a single zombie hit

    Ends immediately if enemies get too close

    Loses usefulness in later rounds

    Summary:Entertaining and occasionally clutch, but unreliable beyond the early game.

    7.Mangler Cannon – High Impact, Low Mobility

      Unlock Level:15
      Salvage Cost:1,250

      This portable launcher fires charged explosive rounds capable of clearing clusters of zombies in seconds.

      Advantages:

      Heavy splash damage

      Effective in confined spaces

      Drawbacks:

      Limited to three shots

      Severely slows movement while charging

      Weak against elite enemies

      Summary:Powerful in the right situation, but dangerous if you’re surrounded.

      6.HKDS – Automated Damage with Limited Efficiency

        Unlock Level:30
        Salvage Cost:1,250

        HKDS releases explosive drones that bounce toward enemies and detonate on impact.

        Advantages:

        Strong emergency crowd control

        No aiming or manual input required

        Drawbacks:

        Small number of drones

        Often wastes damage on single targets

        Rarely clears entire waves

        Summary:A solid panic option, but not a long-term damage solution.

        5.LDBR – Destructive Power with Major Risk

          Unlock Level:38
          Salvage Cost:1,250

          The LDBR creates an intense bombardment zone that annihilates everything within its radius.

          Advantages:

          Extremely high damage output

          Can erase full waves instantly

          Drawbacks:

          Can kill the user without PhD Flopper

          Thick smoke reduces visibility

          Easy to misjudge explosion range

          Summary:Devastating in skilled hands, but unforgiving if used carelessly.

          4.Sentry Turret – Reliable Defensive Support

            Unlock Level:21
            Salvage Cost:1,500

            This automated turret targets zombies within its firing arc, providing consistent background damage.

            Advantages:

            Zombies completely ignore it

            Excellent for holding choke points

            Strong passive DPS

            Drawbacks:

            Stationary placement

            Limited ammo supply

            Requires smart positioning

            Summary:A dependable option for solo players and objective-based play.

            3.D.A.W.G. – Autonomous Battlefield Control

              Unlock Level:1
              Salvage Cost:2,250

              This armored robotic unit patrols the area, attacking zombies with mounted weapons and explosives.

              Advantages:

              Automatically hunts enemies

              Ignored entirely by zombies

              Generates ammo while active

              Drawbacks:

              Expensive to deploy

              Less effective against elites

              Limited uptime

              Summary:One of the strongest all-around Scorestreaks, especially early to mid-game.

              2.Disciple Injection – Ultimate Emergency Transformation

                Unlock Level:53
                Salvage Cost:2,500

                Disciple Injection temporarily transforms you into a floating Disciple, granting immunity and devastating attacks for roughly one minute.

                Advantages:

                Complete immunity to zombie damage

                Grab-and-slam attacks cause massive AoE

                Lifesteal extends duration

                Drawbacks:

                Slow movement speed

                Weak scream ability

                Late unlock and high salvage cost

                Summary:A powerful survival tool ideal for extreme late-round pressure.

                1.Hand Cannon – Best Overall Scorestreak in Zombies

                  Unlock Level:42
                  Salvage Cost:1,250

                  The Hand Cannon delivers unmatched damage efficiency, making it the most reliable and lethal Scorestreak in Black Ops 7 Zombies.

                  Advantages:

                  Massive single-shot damage

                  Pierces multiple enemies

                  Excellent mobility and handling

                  Shreds bosses like Zursa

                  Ten high-powered shots per use

                  Drawbacks:

                  Requires accurate aim

                  Unlocks later than many alternatives

                  Summary:The safest, fastest, and most consistent way to clear waves. If you choose only one Scorestreak, this is it.

                  Best Scorestreak Picks by Playstyle

                  For maximum effectiveness across all maps and modes, prioritize these options:

                  D.A.W.G. – Best early-to-mid game companion

                  Hand Cannon – Highest burst DPS and elite killer

                  Disciple Injection – Strongest late-game power spike

                  Sentry Turret – Ideal for objectives and safe farming

                  Together, these Scorestreaks offer exceptional damage, survivability, and round control. Whether you’re pushing leaderboard runs, practicing routes inside Call of Duty Black Ops 7 Bot Lobbies, or simply mowing down hordes with efficiency, choosing the right Scorestreak setup dramatically increases your success rate.

                  For safer and more controlled practice before attempting high-round runs, many players opt to buy CoD Black Ops 7 Bot Lobbies to refine mechanics and fully master each Scorestreak.

                  Diablo 4 Wreath of Auric Laurel Guide

                  Diablo 4 Wreath of Auric Laurel Guide

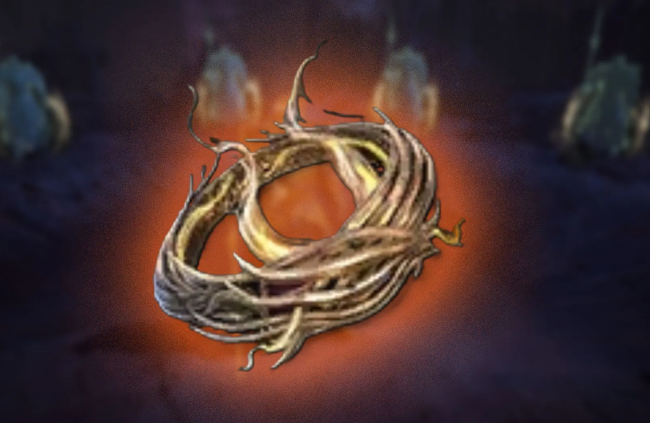
                  The Wreath of Auric Laurel is one of the most powerful Paladin-exclusive rings in Diablo 4, designed for players who want to dominate endgame content through crowd control and explosive damage amplification. This unique ancestral ring transforms Holy Bolt into a reliable debuff engine, enabling Purify procs that dramatically increase damage taken by enemies. For Paladin builds centered on dazing, staggering, and overwhelming elites, the Wreath of Auric Laurel is a near-mandatory pickup.

                  In this guide, we’ll cover what makes the Wreath of Auric Laurel special, break down its stats and unique effects, and explain the most efficient ways to farm it in Diablo 4.

                  Diablo 4: What Is the Wreath of Auric Laurel?

                  The Wreath of Auric Laurel is an ancestral, unique ring exclusive to the Paladin class. Unlike generic damage rings that simply increase stats, this item is deeply tied to Paladin mechanics. Its core purpose is to reward crowd control by enabling Purify through Holy Bolt and massively increasing damage taken by affected enemies.

                  Because Paladin builds often rely on control effects like daze, stagger, and knockdown to survive and scale damage, the Wreath of Auric Laurel fits seamlessly into both single-target boss builds and high-density area-clearing setups. In endgame content such as Nightmare Dungeons, Helltides, and Torment boss encounters, this ring provides consistent value rather than situational power.

                  Stats of the Wreath of Auric Laurel

                  The Wreath of Auric Laurel rolls with an excellent mix of offensive stats that scale extremely well with Masterworking:

                  ·+(8.0 – 10.0)% Attack Speed (up to +15.0% with mastercrafting)

                  ·+(1 – 2) to Dizzying Blow (up to +3 with mastercrafting)

                  ·+(7.0 – 8.0)% Critical Strike Chance (up to +12.0% with mastercrafting)

                  ·+(107 – 121) Strength (up to +182 with mastercrafting)

                  These stats directly reinforce its unique effect. Higher attack speed results in more Holy Bolt casts, increasing the frequency of Purify procs. Dizzying Blow amplifies damage against crowd-controlled enemies, while Critical Strike Chance and Strength boost overall damage scaling. When fully optimized, this ring becomes a cornerstone piece among high-end Diablo 4 Items for Paladins.

                  Unique Effects of the Wreath of Auric Laurel

                  Lucky Hit: Holy Bolt has up to a 40% chance to trigger Purify.

                  Purify: Enemies take (25 – 55)% [x] increased damage for 4 seconds.

                  This unique effect is what pushes the Wreath of Auric Laurel into top-tier territory. Holy Bolt is commonly used in Paladin builds due to its reliability and scaling. With this ring equipped, Holy Bolt becomes a powerful debuff tool, dazing enemies and opening a short window where they take massively increased damage from all sources.

                  This makes the ring especially effective in group play, boss fights, and elite-heavy Nightmare Dungeons, where coordinated burst damage during Purify windows can delete high-health targets.

                  How to Get the Wreath of Auric Laurel in Diablo 4

                  Like most endgame Diablo 4 Items, the Wreath of Auric Laurel can drop from several sources, but targeted farming is far more efficient.

                  Boss Farming

                  Boss farming is the most reliable way to target specific, unique items.

                  1) Grigoire, the Galvanic Saint

                  ·Location: Hall of the Penitent Dungeon, Dry Steppes

                  ·Difficulty: Torment

                  ·Boss Hoard Key: 12× Living Steel

                  Living Steel can be obtained from:

                  ·Tortured Gift of Mysteries during Helltides

                  ·Kurast Undercity using the Tribute of Titans

                  ·Asteroth during Escalating Nightmares

                  2) The Beast in the Ice

                  ·Location: Glacial Fissure Dungeon, Fractured Peaks

                  ·Difficulty: Torment

                  ·Boss Hoard Key: 12× Distilled Fear

                  Distilled Fear drops from:

                  ·Kurast Undercity with Tribute of Titans

                  ·Nightmare Dungeons using Nightmare Sigils

                  Repeatedly farming these bosses offers the best odds of securing the Wreath of Auric Laurel.

                  Nightmare Dungeons and World Events

                  Nightmare Dungeons remain one of the most efficient activities in Diablo 4. High enemy density and end-of-dungeon rewards provide frequent chances at unique drops while also granting Glyph experience and crafting resources. These runs are especially valuable if you plan to buy Diablo 4 materials to accelerate Masterworking and gear optimization.

                  Helltides and World Events are also excellent sources of unique items. During Helltides, prioritize opening:

                  ·Tortured Gift of Jewelry: Ring (75 Aberrant Cinders)

                  ·Tortured Gift of Mystery (250 Aberrant Cinders)

                  Jewelry chests help target rings directly, while Mystery chests offer higher overall unique drop rates.

                  Gambling for Rings Using Obols

                  You can gamble for rings at the Purveyor of Curiosities using Murmuring Obols. Each ring costs 50 Obols. While convenient, this method has a very low unique drop rate and should be treated as a supplemental option rather than a primary farming strategy.

                  Final Thoughts

                  The Wreath of Auric Laurel is a standout, unique ring for Paladin players who thrive on crowd control and damage amplification. Its strong stat rolls, powerful Purify-based unique effect, and exceptional synergy with Dizzying Blow make it one of the most impactful rings available in Diablo 4. If you’re pushing Torment difficulty or optimizing a control-focused Paladin build, this ring is absolutely worth the grind.

                  How to Finish the Love is Dead Quest in Path of Exile 3.27

                  How to Finish the Love is Dead Quest in Path of Exile 3.27

                  The Love is Dead quest in Path of Exile is one of the most emotionally charged moments in the game sprawling storyline.While it’s not a mechanically complex quest, it provides important lore connections, solid experience gains, and a Book of Skill reward-making it worth completing even for seasoned players replaying the campaign.Enhance your gaming experience with instant POE currency purchased through MMOexp!

                  How to Start the Love is Dead Quest

                  1.Once you reach Act 8, head to The Sarn Encampment-your main town hub for this chapter.There, speak to Clarissa, who will give you the quest.

                  2.Clarissa believes the Ankh, when used in an Azmerian resurrection ritual, can restore Tolman’s soul to his body.

                  3.She pleads with you to retrieve the Ankh from The Quay, a dangerous and corrupted area filled with undead enemies.Agree to help her, and your journey begins.

                  Quest Summary

                  Act:8

                  Starting NPC:Clarissa

                  Quest Locations:The Sarn Encampment-The Quay-Resurrection Site-The Sarn Encampment

                  Objectives:Retrieve the Ankh of Eternity and assist Clarissa in the resurrection ritual.

                  Final Boss:Tolman (resurrected as a zombie)

                  Reward:Book of Skill (1 Passive Skill Point and 2 Respec Points)

                  Step 1:Retrieve the Ankh of Eternity

                  Travel to The Quay, accessible from the eastern exit of The Sarn Encampment.The area is a maze of decaying docks and flooded pathways filled with undead, corrupted mariners, and imperial spirits.

                  Tips:It’s one of the more dangerous early Act 8 zones, so be prepared with crowd-control skills or defensive flasks.Equipping strong gear early-especially life and resistance-focused Path of Exile Items-can make this part much easier.

                  You’re looking for the Ankh of Eternity, which is always found deep within The Quay.It rests inside a shrine guarded by several packs of enemies, and sometimes mini-bosses or rare monsters can spawn nearby.

                  Once you pick up the Ankh of Eternity, your quest log will update, instructing you to bring it to Clarissa, who’s waiting in a nearby offshoot area called the Resurrection Site.

                  Step 2:Give the Ankh to Clarissa

                  After retrieving the Ankh, continue deeper into the Quay to locate Clarissa.Speak to her, and she’ll take the Ankh and immediately begin chanting the resurrection spell.

                  As Clarissa channels her energy into the ritual, it becomes clear that something is going horribly wrong.Instead of reviving Tolman as he was, the dark magic within the Ankh twists his body and soul, turning him into a corrupted zombie.

                  The ritual collapses, and waves of undead begin pouring into the arena.You must now fight for your life as Clarissa watches in horror.

                  Step 3:Defeat Zombie Tolman and the Undead

                  This battle unfolds in two phases.

                  First, you’ll face multiple waves of lesser undead-these are weak but numerous.

                  Tips:Keep moving, avoid being surrounded, and use AoE attacks or movement skills like Flame Dash, Whirling Blades, or Leap Slam to control space.

                  If your build feels underpowered here, consider improving your defenses or damage output by buy Path of exile currency and trading for better Path of Exile Items on the market.Even small upgrades-like adding more resistances or chaos mitigation-make this fight significantly smoother.

                  Tips for surviving the Tolman fight:

                  Maintain distance.Tolman melee attacks can chunk large portions of your health bar.

                  Avoid standing still.Keep circling the arena to prevent getting boxed in by adds.

                  Focus on Tolman last.Clear minions first to create breathing room, then concentrate your damage on Tolman.

                  Use resistant flasks.While mostly physical, some of his zombie adds deal chaos or elemental damage.

                  Once Tolman falls, the arena quiets.Clarissa will kneel beside his lifeless form, overcome with grief.

                  Step 4:Speak with Clarissa

                  After the battle, talk to Clarissa to continue the quest.

                  Clarissa vows to destroy the Ankh of Eternity forever so no one else suffers the same fate.She promises to return to The Sarn Encampment and thanks you for your help, though her gratitude is laced with sorrow.

                  Step 5:Return to The Sarn Encampment

                  Return to The Sarn Encampment and find Clarissa once more.She will thank you for helping her put Tolman to rest and reward you with:

                  Book of Skill-Grants 1 Passive Skill Point and 2 Passive Respec Points.

                  Experience for completing the quest.

                  Why Love is Dead Matters

                  1.It adds weight to Clarissa story arc-showing her transformation from hopeful survivor to someone broken by the cruelty of Wraeclast.

                  2.Beyond the lore, the Book of Skill reward is invaluable for any build, giving you a permanent passive point-something that makes the quest essential for every playthrough.

                  If you’re rerunning Path of Exile for the new league or simply experiencing the campaign again, don’t skip Love is Dead-it’s a haunting reminder that even in the pursuit of power, love and loss still define the human heart.

                  How to Finish Every T.E.D.D. Task Fast in Call of Duty: Black Ops 7 Zombies

                  How to Finish Every T.E.D.D. Task Fast in Call of Duty: Black Ops 7 Zombies

                  T.E.D.D. Tasks have officially arrived in Call of Duty: Black Ops 7 Zombies, bringing back the iconic undead bus driver-this time as a mechanical overseer of some of the mode’s toughest optional challenges. These high-intensity trials offer a blend of risk and reward that can dramatically accelerate your early- and mid-round progression. Whether you’re chasing free Perks, bagging bonus loot, or simply pushing yourself to stay ahead of the escalating difficulty curve, mastering T.E.D.D. Tasks are now essential for every Ashwood player.

                  This guide breaks down how T.E.D.D. Tasks work, where they spawn, what challenge types to expect, and the fastest way to complete them every time.

                  What Are T.E.D.D. Tasks in Black Ops 7 Zombies?

                  T.E.D.D. Tasks are timed survival-style trials that begin spawning on Ashwood once Power has been activated. Each task generates a randomized objective and immediately spawns a wave of purple-eyed supercharged zombies that relentlessly rush the player throughout the challenge.

                  Every T.E.D.D. Task features:

                  ·A randomly generated combat or skill objective

                  ·A strict 2-minute timer

                  ·Continuous zombie spawns

                  ·A performance-based reward chest

                  These tasks are currently one of the most efficient ways to earn Perks, salvage, and upgrade items early, especially if you can chain high-tier completions back-to-back. In competitive lobbies or high-round attempts, they’re practically mandatory.

                  When and Where T.E.D.D. Tasks Spawn

                  T.E.D.D. Tasks follow a predictable appearance pattern once Power is engaged.

                  Spawn Timing

                  ·The first task appears a few rounds after the Power activation

                  ·New tasks spawn every ~4 rounds

                  This predictable rhythm lets you plan around your ammo count, armor strength, and map positioning. Once you understand the cycle, you can move proactively toward the next likely landmark before time pressure sets in.

                  How do You Know a Task Has Appeared

                  Whenever a T.E.D.D. Task becomes active, you’ll see:

                  ·A clear HUD notification: “A T.E.D.D. Task Has Appeared”

                  ·The randomized landmark location displayed in the alert

                  ·A minimap icon marking the exact terminal position

                  This prevents players from spending valuable seconds wandering around or running into high-traffic zombie routes by accident.

                  All T.E.D.D. Task Spawn Locations

                  T.E.D.D. Tasks always appear at major points of interest, ensuring that each challenge area includes open space to kite enemies safely. Possible locations include:

                  ·Janus Towers Plaza

                  ·Vandorn Farm

                  ·Blackwater Lake

                  ·Ashwood

                  ·Exit 115

                  ·Zarya Cosmodrome

                  Because all these locations have long sightlines or roundabout paths, each environment supports loop-friendly movement and emergency disengagement.

                  How to Start a T.E.D.D. Task

                  Starting a task is straightforward:

                  1. Approach the terminal

                  2. Pay 500 Essence

                  3. Your randomized challenge starts immediately

                  4. Purple-eyed zombies begin rushing the area

                  5. A 2-minute countdown begins

                  Important: Clear nearby zombies first. Activating a trial while surrounded often leads to instant failure, especially during high-round density spikes.

                  Types of T.E.D.D. Task Challenges

                  Every T.E.D.D. Task assigns one random challenge objective. Most fall into four main categories:

                  1. Weapon-Restricted Challenges

                  These require kills with specific weapon classes or items:

                  ·SMG kills

                  ·Shotgun kills

                  ·Combat Axe eliminations

                  Fast reload speeds and tight looping paths make these far easier.

                  2. Precision Challenges

                  Perfect for players confident in aim and recoil control:

                  ·Get X critical hits

                  ·Headshot-specific elite enemies

                  ·Maintain a hit streak or combo

                  Marksman Rifles, burst ARs, and tuned SMGs excel here.

                  3. Melee Challenges

                  Often the hardest-but T.E.D.D. helps by equipping you with Melee Macchiato, granting rapid melee attacks.

                  Objectives include:

                  ·Get X melee kills

                  ·Eliminate specially marked zombies with melee

                  Loop the cover tightly and strike only when safe.

                  4. Survival & Utility Challenges

                  These trials mix combat and mobility:

                  ·Stay inside a marked circle

                  ·Survive without taking damage

                  ·Use specific tactical equipment

                  These often become chaotic late-round, so aim to complete them early whenever possible.

                  T.E.D.D. Task Reward Tiers Explained

                  Completing a task spawns a reward chest with loot based on performance. There are three tiers:

                  Tier 1 – Basic Rewards

                  ·Grenades & tactical gear

                  ·Small salvage bundles

                  ·Common crafting items

                  Tier 2 – Strong Rewards

                  ·Armor plates & upgrade tools

                  ·Rare weapon mods

                  ·Mid-tier consumables

                  Tier 3 – Premium Rewards

                  ·Free random Perk you don’t already own

                  ·Epic/Legendary gear

                  ·High-tier upgrade tools

                  The free Perk reward is the primary reason many players prioritize T.E.D.D. Tasks. It:

                  ·Saves thousands of Essence

                  ·Always gives a new Perk

                  ·Accelerates early and mid-game survivability

                  Stacking Tier 3 rewards every few rounds can completely reshape your loadout curve.

                  Tips for Completing T.E.D.D. Tasks Fast

                  To consistently finish every task quickly and claim Tier 3 loot-use the following strategies:

                  ·Clear the area before activation

                  ·Run circular routes around obstacles to manage the purple-eyed swarm

                  ·Use a high-fire-rate weapon for precision challenges

                  ·Start tasks before high rounds, when zombie health makes timers difficult

                  ·Always aim for Tier 3 clearance to secure Perks early

                  If you want to practice movement, recoil control, or challenge flow without pressure, Call of Duty Black Ops 7 Bot Lobbies are extremely helpful. Many players even choose to buy CoD Black Ops 7 Bot Lobbies to train safely, sharpen their aim, and master challenge types before pushing deeper into Zombies.

                  Final Thoughts

                  T.E.D.D. Tasks bring fast-paced chaos and massive rewards to Black Ops 7 Zombies, offering some of the best power progression options in the entire mode. By learning the spawn cycles, understanding challenge types, and preparing the right weapons, you can finish every task quickly and secure top-tier loot with ease. Master these trials early, and your high-round survival chances-and your overall fun-skyrocket.

                  Path of Exile 2 Guide:Beating Captain Hartlin in Act Four

                  Path of Exile 2 Guide:Beating Captain Hartlin in Act Four

                  Path of Exile 2 continues Grinding Gear Games tradition of challenging, high-stakes boss encounters that demand quick reflexes, smart positioning, and well-tuned builds. One of the standout early challenges in Act Four is Captain Hartlin, a once-human seafarer now transformed into a cursed undead monster.

                  You’ll encounter Captain Hartlin during the Dark Mists questline in Act Four. Once the son of Freya Hartlin, he was lost to the mists of Kedge Bay, only to resurface as a twisted, undead being fused with ship parts and ancient relics. By the time you reach Journey Edge, it’s too late to save him-what’s left is a powerful boss fight and a tragic conclusion to his story.

                  This battle marks a significant moment in Act Four, forcing players to balance single-target pressure with spatial awareness and survival mechanics.

                  The Arena and Core Challenge

                  Journey Edge is an open, foggy battlefield-perfect for Hartlin’s wide-reaching attacks. He’ll often fill large portions of the arena with danger zones, so maintaining good movement and positioning is key.

                  Hartlin high physical resistance makes the fight particularly tough for melee builds. Unless you have armor-penetrating abilities or strong offensive upgrades, you’ll find his defenses punishing. Spellcasters have the advantage here-his resistance to elemental damage is notably weaker, allowing magic users to burn him down faster.

                  If you’re struggling, it’s worth spending Path of Exile 2 currency to upgrade your gems or craft stronger gear.Use MMOexp to purchase instant POE 2 Currency and enhance your gaming experience. Even minor boosts can tip this fight in your favor.

                  The Wheel Mechanic Explained

                  The fight signature feature is the captain wheel around Hartlin’s neck. The skulls on the wheel glow one of three colors-Purple, Green, or Blue-each corresponding to a specific special attack. Hartlin spins the wheel mid-fight to change colors, forcing you to read and react accordingly.

                  This color system teaches players to anticipate telegraphed attacks, a key skill for later encounters in Path of Exile 2.

                  Additional Attacks

                  Hartlin mixes his wheel specials with devastating nautical-themed strikes:

                  Anchor Swing-A massive, slow swing with his anchor that can easily one-shot underprepared players. Time your dodges carefully.

                  Cannon Blast-A quick ranged attack fired from a small cannon attached to his body. Keep moving sideways to avoid it.

                  Once Hartlin drops below 33% health, the fight enters its most chaotic stage.

                  “Fire in the Hole!”-Hartlin summons ghostly cannons in a ring around the arena that bombard the field with explosive shells. The safest strategy is to move into the center and circle tightly, baiting cannonballs to overshoot.

                  If you survive this barrage, you’ll have a clear opportunity to finish him off.

                  Strategy Tips

                  Use Elemental Damage-Fire, Lightning, and Chaos damage bypass his high armor and burn through his health quickly.

                  Clear Minions Fast-Hartlin periodically summons skeletons; use AoE or crowd control to prevent getting overwhelmed.

                  Capitalize on Openings-After performing Green Anchor Drop, Hartlin leaves himself exposed-perfect time to use your strongest skills.

                  Stay Mobile-His attacks cover a wide area, so constant movement helps you avoid being cornered.

                  Save Mobility Skills for the Final Phase-Use dash or blink abilities to dodge cannon fire during the “Fire in the Hole” sequence.

                  Rewards for Defeating Captain Hartlin

                  Victory rewards you with standard mid-act loot, including:

                  Verisium, a quest item required to advance the Dark Mists storyline.

                  Rare gear that can be upgraded to strengthen your build.

                  Currency items to restock before the next set of challenges.

                  While Hartlin doesn’t drop a unique item, the guaranteed quest progression makes this encounter essential.Don’t let currency shortages hold you back-acquire your POE2 Currency for sale now at MMOexp and thrive!

                  Why This Battle Matters

                  Captain Hartlin fight acts as a learning milestone in Path of Exile 2. The wheel mechanic teaches color-coded telegraphs, his summons test your crowd-control efficiency, and his cannon finale demands sharp mobility and focus.

                  Beating him not only moves Freya tragic narrative forward-it’s also proof that your build is ready for the game tougher midgame challenges.

                  Though not the most complex boss in the game, Captain Hartlin stands out for his mix of emotional storytelling and demanding mechanics. His combination of heavy armor, unpredictable color phases, and explosive finale make him one of Act Four most memorable and rewarding fights.