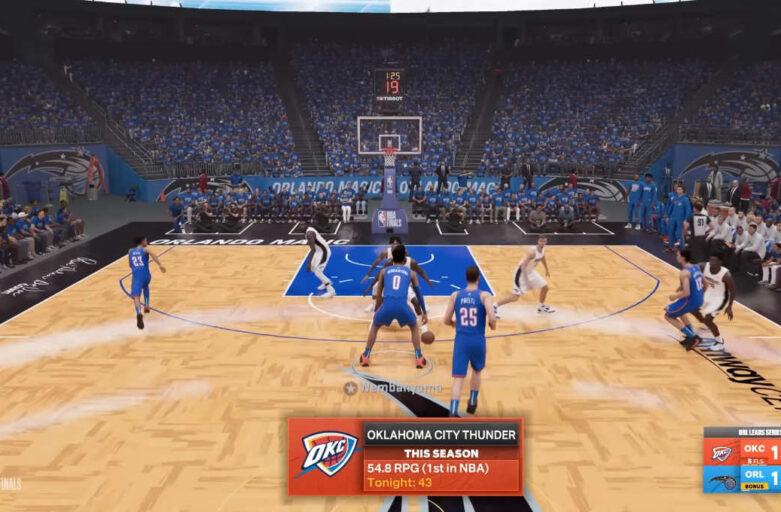
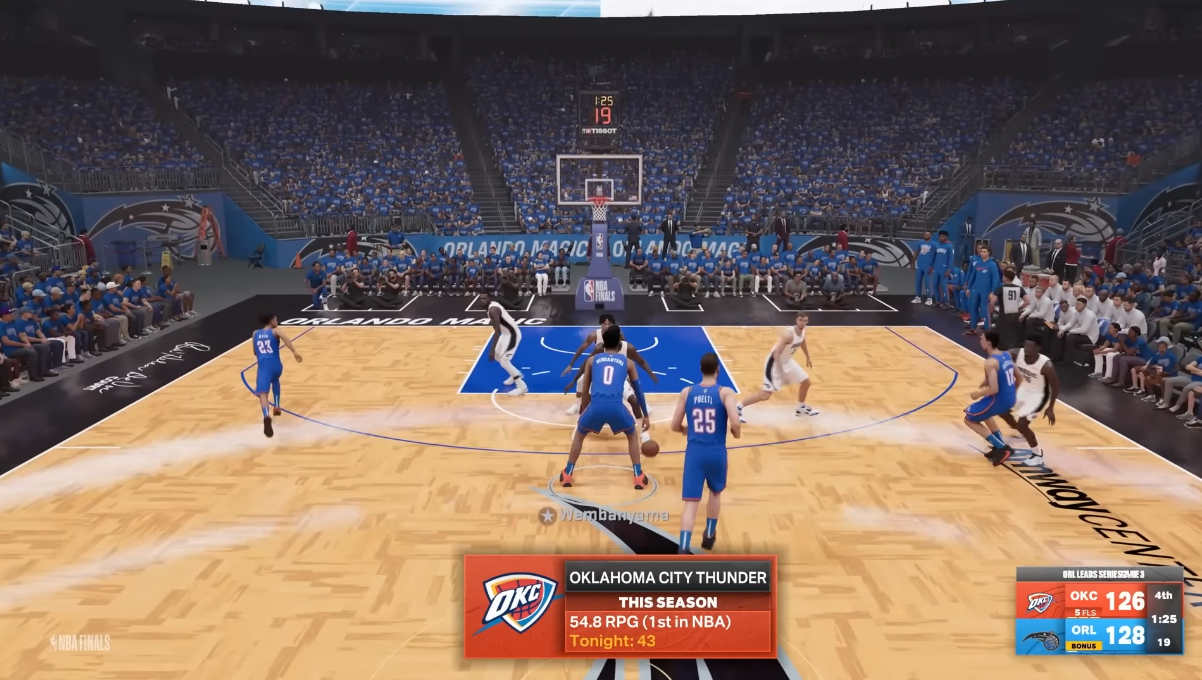
NBA 2K24 is generating immense buzz and excitement in the gaming community, especially after the recent event where popular 2K creator Duke Dennis was spotted playing the game early alongside Mike Wang, the gameplay director for NBA 2K. As the gameplay director, Mike Wang holds a crucial role in making pivotal gameplay decisions, making his presence at the event even more significant.
Duke Dennis, a revered legend in the NBA 2K community, expressed his thoughts on the current state of the game in one of his YouTube videos. He reminisced about the old days when being a legend or mascot in the game carried significant weight and represented hard-earned accomplishments. He yearned for a return to the days when grinding for these achievements felt worthwhile and gave players a reason to stay immersed in the game for hours on end.
However, some players argue that the desire for a legendary grind doesn’t make someone a “nerd,” as Duke Dennis pointed out. It’s a sentiment shared by many who feel that rewarding dedicated players with unique in-game achievements and items helps maintain interest and excitement in the game.
Despite these nostalgic reflections, exciting NBA 2K24 news was unveiled during the event. Fans are eagerly anticipating a possible demo or Prelude to be released in the coming weeks. The demo has proven to be crucial for players to provide feedback and for the developers to identify and address potential issues before the official game release. Previous demos for NBA 2K21 and NBA 2K20 have been instrumental in fine-tuning the game and enhancing the overall player experience.
Additionally, during the event, the players were seen wearing attire labeled “Rookie One Court.” This sparked speculation about the return of the legendary grind in NBA 2K24. While nothing has been confirmed, the coincidence of this event happening on a court with such a name has many fans hopeful for the return of more meaningful in-game achievements and rewards.
Another piece of exciting news emerged from 2K’s Twitter account, hinting at the possibility of cross-platform play in NBA 2K24. This feature would allow players from different gaming platforms to interact and compete with each other, fostering a more diverse and inclusive gaming experience. Cross-platform play has been implemented in other games successfully, and if NBA 2K24 includes it, it could lead to a vibrant and thriving community of players across various platforms. So it is even more necessary to come to NBA2King to buy NBA 2K24 MT to stay competitive!
Concerns have also arisen about server capacity in the game’s online modes, such as the Park. The current number of courts and players allowed per server has led to overcrowding and latency issues. While cross-platform play might alleviate some problems, it remains uncertain how 2K will handle these challenges.
In terms of gameplay, players are eagerly anticipating improvements and advancements in graphics and performance. Some have expressed their hopes for the game to run at a higher frame rate on next-gen consoles, offering a smoother and more immersive experience. A boost in frame rate, even up to 90 frames per second, would be a welcomed enhancement for the basketball simulation title.
2K also teased improvements to the WNBA mode, introducing WNBA signature shoes and new badge perks. This move signifies the developers’ commitment to offering a comprehensive and engaging experience for players invested in the WNBA aspect of the game.
Moreover, 2K24 promises to include a new mode called “LeBron Era,” enabling players to lead their teams against or alongside LeBron James during pivotal moments in his career. This feature could provide an exciting and unique perspective on LeBron’s journey in the NBA.
Another addition is the “Simple Mode,” aimed at casual players who prefer a more straightforward and accessible experience without compromising the core gameplay mechanics. This mode will cater to those who want to jump into the action quickly and enjoy a more laid-back gaming experience.
In conclusion, NBA 2K24 is generating significant anticipation and hype among the gaming community, with players eager to see how the game will evolve with the potential return of the legendary grind, cross-platform play, and various other new features. As the release date draws near, fans will be eagerly awaiting any further announcements and details about the game. NBA 2K24 promises to be a game-changing experience for basketball gaming enthusiasts, and players are counting down the days until they can step onto the virtual court once again.
FIFA 23, the latest installment in the popular FIFA video game series, provides players with an immersive and competitive football experience. Winning matches in FIFA 23 requires a combination of skill, strategy, and understanding of the game’s mechanics. In this essay, we will explore various tips and strategies that can help players improve their gameplay and increase their chances of winning more matches.
1, Master the Basics To succeed in FIFA 23, it is crucial to have a strong foundation in the basic gameplay mechanics. Start by familiarizing yourself with the controls, including passing, shooting, and defending. Practice dribbling and mastering different skill moves to outmaneuver opponents. Understanding player positioning and effective team communication will also give you an edge. By mastering the basics, you will have a solid platform to build upon and enhance your overall gameplay.
2, Study and Adapt to Tactics Tactical awareness plays a significant role in FIFA 23. Study different formations and their strengths and weaknesses. Experiment with various tactical approaches such as possession-based play, counter-attacking, or high-pressing. Understand how different tactics can influence your team’s performance and adapt your strategy based on the situation. Flexibility and the ability to adjust your tactics mid-match will give you a tactical advantage over opponents and help you capitalize on their weaknesses.
3, Utilize Player Instructions FIFA 23 allows you to give specific instructions to your players, such as how aggressive they should be, their positioning, and their involvement in certain aspects of the game. Take advantage of player instructions to tailor your team’s gameplay to your style and strategy. For example, you can instruct your full-backs to overlap and contribute to the attack or instruct your central midfielders to stay back and provide defensive cover. Utilizing player instructions effectively will optimize your team’s performance and enhance your chances of winning matches.
4, Practice Set-Pieces Set-pieces, including free kicks, penalties, and corners, are crucial moments in a match that can turn the tide in your favor. Dedicate time to practice set-piece routines and become familiar with aiming and power mechanics. Experiment with different strategies, such as near post, far post, or short corners, to keep opponents guessing. Additionally, pay attention to your opponent’s set-piece routines to anticipate their moves and defend effectively. A well-executed set-piece can provide you with a decisive advantage and lead to more goals and victories.
5, Develop Effective Defending Techniques Solid defending is essential to winning matches in FIFA 23. Focus on improving your defensive skills, such as timing tackles, jockeying, and positioning. Learn to anticipate your opponent’s moves, cut passing lanes, and press effectively without leaving gaps in your defense. Utilize controlled defending techniques rather than reckless challenges, as mistimed tackles can result in penalties or dangerous free kicks for your opponent. Developing effective defending techniques will help you maintain control of the game and frustrate your opponents’ attacks.
6, Learn to Exploit Space and Counter-Attacking Opportunities Understanding how to exploit space and capitalize on counter-attacking opportunities can be game-changing in FIFA 23. Pay attention to gaps in your opponent’s defense and exploit them by making quick, incisive passes or through balls. Utilize the speed of your attackers to catch the opposition off guard and launch devastating counter-attacks. However, be mindful of not overcommitting to counter-attacks, as leaving your defense vulnerable can result in a swift counter from your opponent. Balance between attacking and defensive strategies is crucial to success.
7, Analyze and Learn from your Matches After each match, take the time to analyze your gameplay and identify areas for improvement. Watch replays to understand your strengths and weaknesses, paying attention to positioning, decision-making, and missed opportunities. Reflect on the mistakes you made and work on correcting them in future matches. Additionally, studying your opponents’ gameplay can provide valuable insights into their strategies and tactics, enabling you to better prepare for future encounters. Continuous analysis and learning will contribute to your growth as a FIFA 23 player.
8, Play Online and Engage in Competitive Matches Engaging in online matches and competing against skilled opponents is an excellent way to improve your gameplay. Playing against human opponents presents different challenges and strategies compared to the AI. It provides an opportunity to test your skills, learn from others, and adapt to different playstyles. Embrace the competitive aspect of FIFA 23, participate in online tournaments, and engage with the FIFA community, you can choose MMOexp group – provide safe & fast FUT 23 FIFA Coins all day. The more you play against quality opponents, the more you will refine your skills and increase your chances of winning matches.
Winning more matches in FIFA 23 requires dedication, skill, and a strategic approach to the game. By mastering the basics, adapting tactics, utilizing player instructions, practicing set-pieces, improving defending techniques, exploiting space, analyzing matches, and engaging in online competition, you can enhance your gameplay and increase your chances of success. Remember, winning in FIFA 23 is not just about individual skill but also about strategic decision-making and adapting to different situations. With perseverance and continuous improvement, you can rise through the ranks and experience the thrill of victory in FIFA 23.
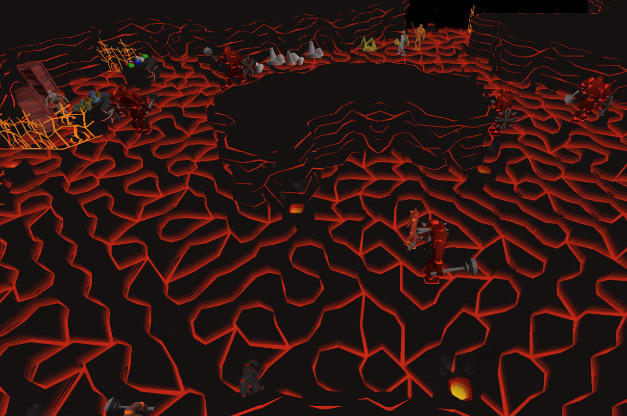
If you’re not an experienced OSRS player, let me bring it to your notice that Fight Caves osrs is a minigame that offers a unique reward. This minigame (TzHaar Fight Caves osrs) can be found in the Karamja Volcano (Mor Ul Rek) and is quite difficult in terms of defeating the enemies. Before we get into the detailed section of the guide, let’s clear out the general information.
Location
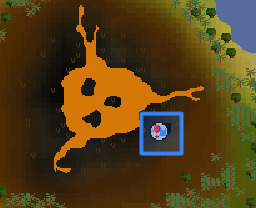
There’s a path that leads beneath the Karamja island, and this can be accessed through Crandor or Karamja dungeon. Once you’ve reached below, you will notice that there’s a cave, and that very cave will lead to the city of Mor Ul Rek.
In General
If you’ve faced TzTok-Jad before, you can unlock it as a Slayer task for an amount of 100 Slayer points. This task can be given to you by Duradel, Chaeldar, or Nieve. You will find numerous creatures wandering around the Fight Caves waiting for a player to enter, and to reach the final boss, you will have to defeat Tz-Kih, Tz-Kek, Tok-Xil, Yt, Mejkot, and Ket-zek.
Preparing For the Fight
The primary goal of successfully completing a round of TzHaar Fight Caves is to defeat a level 702 boss named TzTok-Jad. Being one of the highest leveled bosses in the entire game, it’s obvious how dreadful he can be in dealing damage. Let’s get to preparing for this Jad guide osrs.
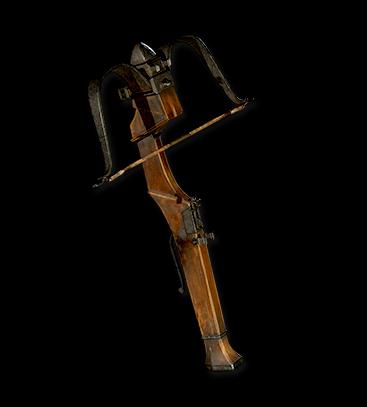
There’s no specific requirement relating to the attack style that you should use, but focusing on using Ranged attacks is the best option because there are ways to trap your enemies behind obstacles. Thus, allowing you to clear most of the waves without much trouble. Completing the minigame takes a few hours because it can get lengthy with so many waves, so it’s best that you stock up on as many supplies as you can. You don’t really need any special requirements to enter the cave. However, it is recommended that you enter with at least 70 Defense, HP, Ranged, and Prayer. In terms of weapons for Ranged, you should go with Toxic Blowpipe > Twisted Bow > Rune Crossbow. You can also go with other affordable crossbows like Karil’s and Armadyl. If you’re choosing to go with melee, then you should at least have level 94 in magic, along with weapons like Saradomin God Sword or Dragon Halberd.
The Fight
Moving onto the final battle, which is the boss Jad himself; you will require focus and patience while fighting against him. There are 62 waves of monsters before Jad, and it can get frustrating, but always remember to keep the flow going because if you end up dead, you’ll have to start from the very beginning again. The boss uses three attack styles; Melee, Ranged, and Magic, so ensure that you have auto retaliate switched on, along with the necessary prayers.
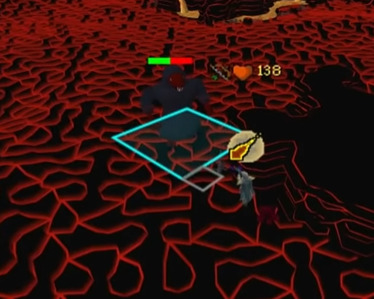
Melee: Melee attacks are Jad’s fastest attacks, so you’ll have to watch out for his fists because that’s what he’ll be using. To avoid it, make sure that you’re at a good distance from him because if you’re up close then he’ll use these attacks for sure.
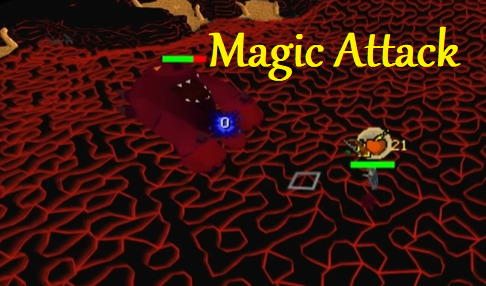
Magic: Melee’s attacks can be identified by the way he stands up and breathes fire at you. A good point is that you’ll hear a growling noise before the attack is initiated. So, keep your eyes and ears sharp and use Protect from Magic at the right time.
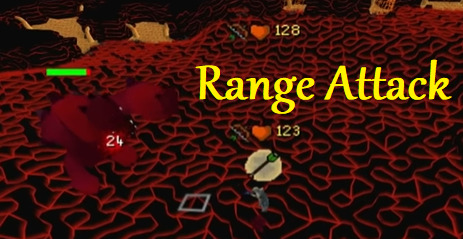
Ranged: Ranged attacks can be identified by the way he slams his front legs on the ground because that’s when a crack will appear on the floor, resulting in a boulder falling right on top of you. So, to avoid it, always keep your focus on him and switch your prayer to Protect from Missiles.
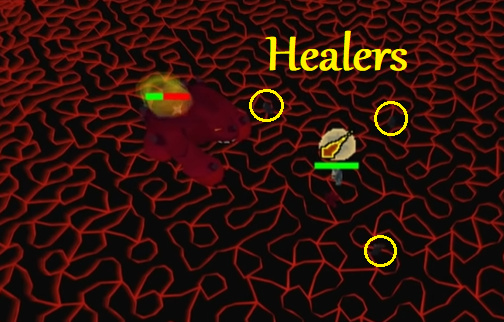
During the fight caves osrs, Jad will also spawn healers when he’s down half his health. The healers are low in level, but they can be quite troublesome. The best strategy is to attack them as soon as they spawn so that their focus can be directed towards you. This will allow you to completely focus on defeating Jad, without worrying about the healers healing him.
Reward
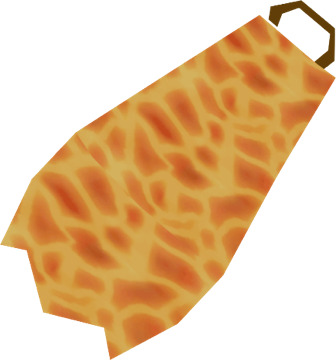
After successfully defeating him, you’ll receive 8,032 Tokkul (Mor Ul Rek’s Currency), along with a Fire Cape. This cape is the best melee combat cape in the game, and it cannot be compared with the other. The reason is that – not only is it the best but also the only cape that provides an animation effect (Lava Animation).
Source: Cheap, Fast, And Safe Website For You To Buy OSRS Gold, RS3 Gold, Items, Accounts, Power Leveling, Quest Service – RSOrder.com!
The Darkmoon Flair is a set of minigames that can be approached by players to gather tickets and purchase their preferred rewards. There are tons of rewards to choose from, which makes it a primary factor for players to participate. Apart from that, the Darkmoon Faire also offers other means to collect tickets and increase the player’s reputation. These means include Profession Quests, Artifact Gathering, PVA Deathmatch, and so forth.
Changes Overview
In the Shadowlands, the Recipes; Extra Lemony Herb Filet, Extra Sugary Fish Feast, and Extra Fancy Darkmoon Feast can be bought in exchange for Darkmoon Daggermaws. These changes have brought in food items that are usable above character level 50, and many new Darkmoon Trinkets have also been added onto the platform, along with Profession quests, allowing you to save a ton of gold during the last few skill levels.
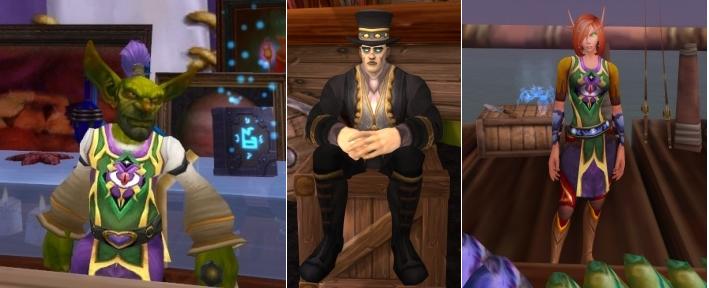
Speaking in terms of Battle for Azeroth, there are newly updated Darkmoon Cards, and a new toy called Hot Buttered Popcorn, which can be purchased from Stamp Thunderhorn, which is a humanoid Food Vendor.
In Patch 8.3, there was a new Darkmoon Arcade added onto the platform, which allows players to play their preferred Azeroth-IAN arcade games. You have to seek out a Mechagnome named Lynnish Hardmode, who is the Arcade Proprietor, located behind the Darkmoon Rollercoaster, to take on your preferred arcade games.
In Patch 8.1.5, there were three new pets added; Murloc Balloon, Wolf Balloon, and Horse Balloon, that can be purchased for ninety Darkmoon Prize Tickets. If you choose to fish in that very same area, you will get a chance to yield two newly added cosmetics; Severed Azurefin Head, and Severed Crimsonscale Head.
In Patch 8.1, the skill-up quests for various Professions were looked into and fixed, so that they can once again offer +5 skill points per profession.
Currency, Timeline, and Location
First off, as mentioned above, the currency of the Darkmoon Faire is Darkmoon Prize Tickets, and you can earn these by participating in various minigames. Alternatively, you can also purchase a Darkmoon Ticket Fanny Pack from the Auction House, and this item contains 400 to 500 Darkmoon Prize Tickets.
Being a monthly event, the Darkmoon Faire lasts for exactly one week and starts the next minute after midnight has passed on the first Sunday of every month. Every month you can earn a maximum of 145 Darkmoon Prize Tickets, which is more than enough to buy an intriguing reward. For players, who are looking to reach the Exalted reputation rank with the Darkmoon Faire, it will take you about five months to do so from Neural.
The area is located on Darkmoon Island, where you are only allowed to teleport when the Darkmoon Faire event is in process. You can find a detailed map on the official wiki – of the surroundings present in the Faire, as well as the indications to where you can locate a specific NPC.
The Inky Black Potion
The Darkmoon Faire offers a variety of rewards, ranging from temporary buffs to exotic mounts and pets. Most of these rewards can be purchased by gathering and spending Darkmoon Prize Tickets. After the changes made in Patch 7.2, you can now purchase Inky Black Potion for a few World Of Warcraft Gold coins from Rona Greenteeth. This potion is used to make your nights darker in the game.
The Sayge’s Buffs
Sayge is an NPC spawned during the Darkmoon Faire, and he provides various temporary buffs, such as +10% Intellect. These buffs are quite useful while levelling up your game character, and especially because they don’t have any additional requirement other than speaking to Sayge himself at the Darkmoon Faire. However, do keep in mind that these buffs tend to disappear as you enter a dungeon or raid.
The WHEE! Buff
As you enter the Darkmoon Faire, you can locate the Darkmoon Carousel (a few yards to your right) or the Darkmoon Rollercoaster. Either one of them will grant you the WHEE! Buff after riding them for 30 seconds, allowing you to increase your reputation and experience rate by 10% for an hour to be exact. Yes, it can stack up with other experience or reputation buffs. In order to ride the Carousel or Rollercoaster, you will need a Darkmoon Ride Ticket, which can be found within a Ride Ticket Book. This book can be bought from the NPC at the entrance of the area. There’s also a similar buff that is given after consuming a Darkmoon Top Hat, which then again, needs to be bought from Gelvas Grimegate for ten Darkmoon Prize Tickets.
Vanity Items
Gelvas, Chester, and Henry Gust sell a number of Darkmoon Faire vanity items that can be purchased for the Darkmoon Prize Ticket. The items include Darkmoon “Tiger”, Darkmoon “Dragon”, Darkmoon “Gryphon”, Darkmoon “Murloc”, Darkmoon “Rocket”, Darkmoon “Wyvern”, Darkmoon “Cougar”, Darkmoon “Nightsaber”, Darkmoon “Snow Leopard”, Darkmoon “Sword”, Darkmoon “Flower”, Darkmoon “Hammer”, Darkmoon “Storage Box”, Cloak of the Darkmoon Faire, Noble’s Fancy Boots, Noblewoman’s Skirt, Nobleman’s Pantaloons, Noblewoman’s Finery, Nobleman’s Coat, Last Deck of Nemelex Xobeh, Green Dance Stick, Purple Dance Stick, Devlynn Styx Mask, Blighthead Electric Beehive Mask, Blighthead Bitter Wounds Mask, Blighthead Grim Smile Mask, Blighthead Slack-Jaw Mask, Blighthead Mohawk Mask, and Blighthead Romero Mask.
Since the changes in Patch 8.1.5, you can now fish Severed Crimsonscale Head and Severed Azurefin Head from the water that is surrounding the Darkmoon Island. There are also a number of vanity items in the form of achievement rewards, and these include, Darkmoon Gazer from Big Wanderluster, Checkered Flag from Big Race Roadhog, and Darkmoon Cannon from Big Powermonger.
Gears & Firework
Since the changes in Patch 7.2.5, killing the Death Metal Knight during the Blight Board Concert provides you with a chance to loot and obtain level 62 items. It basically scales with your character level, and it is level 62 at 110. These items include Chain-Linked Cage Helm, Leather-Lined Cage Helm, Lightly-Padded Cage Helm, Steel-Reinforced Cage Helm, and Necromedes, the Death Resonator.
Apart from the vendors that sell a variety of fireworks items, there is also the NPC named Boomie Sparks that sells Darkmoon Firework, which is specific to the Faire and is required to complete one of the Darkmoon achievements.
Pets & Mounts
Pets and Mounts can be purchased from the NPC’s named Lhara and Gelvas Grimegate for Darkmoon Prize Tickets. They have a variety of Darkmoon Pets and Mounts to choose from, and they include, Darkmoon Balloon, Darkmoon Cub, Darkmoon Hatchling, Darkmoon Monkey, Darkmoon Tonk, Darkmoon Turtle, Darkmoon Zeppelin, Darkmoon Dancing Bear, Swift Forest Strider, and Darkmoon Dirigible. In addition, you can also obtain a Sea Pony (From Fishing), Darkmoon Rabbit (By Killing the Darkmoon Rabbit), Moon Moon (By Killing the Moonfang), Hog’s Studded Collar (After Completing ‘That’s Whack!’), Blorp’s Bubble (By Turning 50 Darkmoon Daggermaws to Galissa Sundew), Translucent Shell (By Turning 100 Darkmoon Daggermaws to Galissa Sundew), Darkwater Skate (By Turning 500 Darkmoon Daggermaws to Galissa Sundew), Shimmering Moonstone (By Killing Moonfang), Race MiniZep Controller (By Completing ‘Big Rocketeer: Gold’), and Horse Balloon/Murloc Balloon/Wolf Balloon (By Purchasing From Carl Goodup).
Toys
Toys can be obtained in the form of achievement rewards, and they include, Darkmoon Ring-Flinger from Triumphant Turtle Tossing, Attraction Sign from Wanderluster: Gold, Everlasting Darkmoon Firework from Rocketeer: Gold, Gaze of the Darkmoon from Powermonger: Gold, Fire-Eater’s Vial from Darkmoon Raver Roadhog, and Darkmoon Tonk Controller from Ace Tonk Commander, for the darkmoon faire location. You can also purchase Darkmoon Whistle and Hunting Momento for 90 Darkmoon Faire Tickets from Gelvas Grimegate and Chester, respectively. Other than that, Seafarer’s Slidewhistle can be purchased from Galissa Sundew for 25 Darkmoon Daggermaws.
You can obtain the Ring of Broken Promises by killing Enrinys, who are located in the underwater cave beneath the shipwreck (Coordinates: 74, 39), for wow darkmoon faire, otherwise known as wow DMF. Doing so will reward you with an item that is used to start and complete a quest which will reward you with the Ring of Broken Promises. Blight Boar Microphone can be obtained during the Blight Boar concert, where you have to kill and loot the Death Metal Knight. Finally, you can obtain the Hot Buttered Popcorn from the NPC named Stamp Thunderhorn at a cost of 50 Darkmoon Prize Tickets.
Flasks & Potions
Flasks and Potions can be purchased for one Darkmoon Prize Ticket (otherwise known as wow darkmoon faire, wow dmf) from the NPC named Faldar Willowshade. The items he has in stock are; Darkmoon Draught of Alacrity, Darkmoon Draught of Defense, Darkmoon Draught of Deflection, Darkmoon Draught of Deftness, Darkmoon Draught of Divergence, Darkmoon Draught of Flexibility, Darkmoon Draught of Precision, Darkmoon Draught of Supremacy, Darkmoon Tincture of Alacrity, Darkmoon Tincture of Defense, Darkmoon Tincture of Deflection, Darkmoon Tincture of Deftness, Darkmoon Tincture of Divergence, Darkmoon Tincture of Flexibility, Darkmoon Tincture of Precision, and Darkmoon Tincture of Supremacy.
Understanding Socketed Items is a complicated task, and that’s primarily in terms of their number and how to add them to the existing items. There are a total of three cube recipes to add, along with the ‘Socket Quest’ in Act V. Also, items can be generated with a variable number of sockets, and the number depends on the creature that drops them.
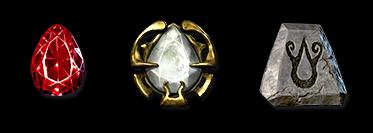
Do keep in mind that you cannot add a socket to a D2R Item that already has one or more sockets, with the socketing quest reward or any recipe. The only exception is the three chipped gems and one magical recipe which creates a magical weapon with refreshing properties and 1 to 2 sockets. It doesn’t add any diablo 2 Resurrected sockets to the existing weapon cause it rolls new Modifiers on the weapon, so it’s random.
How To Obtain Socketed Items?
You can find socketed items by killing monsters in the game while wearing Magic Find. The key isn’t to have any type of Magic Find, because the more you have, the better the chances of magical or above-tier (Rare, Set, Unique) items being dropped. The best MF (Magic Find) to find socketed items is zero, but even though you can’t avoid a small bonus percentage, it won’t make much of a difference, so don’t worry. The best characters for finding such items are Sorceress in high-level areas of the Hell Difficulty Mode, and Amazons for the Secret Cow Level area for diablo 2 sockets since they can kill at a tremendous pace in those places.
How To Un-Socket Items?
Well, there’s good news and bad news when it comes to Un-Socketing Items. The good news is that removing Jewels, Runes, and Gems from an item is possible, and the bad news is that you lose them forever when you do so. However, you won’t lose the item so that’s a plus point.
To remove an item from a socket you have to place 1 Hel Rune, Scroll of Town Portal, and The Socketed Item into the Horadric Cube.
The Socket List
The following numbers represent I-Level 1 to 25, 36 to 40, and 41+, respectively.
Set #One
Bone Knife (1, 1, and 1), Buckler (1, 1, and 1), Burnt Wand (1, 1, and 1), Dagger (1, 1, and 1), Defender (1, 1, and 1), Dirk (1, 1, and 1), Mithril Point (1, 1, and 1), Poignard (1, 1, and 1), Rondel (1, 1, and 1), Wand (1, 1, and 1) for diablo 2 socket recipes, Yew Wand (1, 1, and 1), Circlet (1, 2, and 2), Coronet (1, 2, and 2), Diadem (1, 2, and 3), Tiara (1, 2, and 3), Armet (2, 2, and 2), Ataghan (2, 2, and 2), Barbed Shield (2, 2, and 2), and Basinet (2, 2, and 2).
Set #Two
Battle Cestus (2, 2, and 2), Blade (2, 2, and 2), Bloodlord Skull (2, 2, and 2), Bone Helm (2, 2, and 2), Bone Shield (2, 2, and 2), Bone Wand (2, 2, and 2), Cantor Trophy (2, 2, and 2), Cap/hat (2, 2, and 2), Casque (2, 2, and 2), Cestus (2, 2, and 2) for diablo 2 socket recipes, Chain Mail (2, 2, and 2), Club (2, 2, and 2), Cudgel (2, 2, and 2), Cutlass (2, 2, and 2), Demon Head (2, 2, and 2), Demonhide Armor (2, 2, and 2), Elegant Blade (2, 2, and 2), and Falcata (2, 2, and 2).
Set #Three
Falchion (2, 2, and 2), Fascia (2, 2, and 2), Fetish Trophy (2, 2, and 2), Field Plate (2, 2, and 2), Flanged Mace (2, 2, and 2), Full Helm (2, 2, and 2), Gargoyle Head (2, 2, and 2), Ghost Armor (2, 2, and 2), Ghost Wand (2, 2, and 2), Giant Conch (2, 2, and 2), Gladius (2, 2, and 2), Grave Wand (2, 2, and 2), Grim Helm (2, 2, and 2), Grim Shield (2, 2, and 2), Grim Wand (2, 2, and 2), Hand Axe (2, 2, and 2), Hand Scythe (2, 2, and 2), Hard Leather Armor (2, 2, and 2), Hatchet (2, 2, and 2), and Hatchet Hands (2, 2, and 2).
Set #Four
Heater (2, 2, and 2), Heirophant Trophy (2, 2, and 2), Hellspawn Skull (2, 2, and 2), Helm (2, 2, and 2), Hydra Edge (2, 2, and 2), Hydraskull (2, 2, and 2), Jo Staff (2, 2, and 2), Katar (2, 2, and 2), Leather Armor (2, 2, and 2), Legend Spike (2, 2, and 2), Lich Wand (2, 2, and 2), Luna (2, 2, and 2), Mace (2, 2, and 2), Mighty Scepter (2, 2, and 2), Minion Skull (2, 2, and 2), Mummified Trophy (2, 2, and 2), Overseer Skull (2, 2, and 2), Petrified Wand (2, 2, and 2), Plate Mail (2, 2, and 2), Polished Wand (2, 2, and 2), Preserved Head (2, 2, and 2), Quilted Armor (2, 2, and 2), Reinforced Mace (2, 2, and 2) for diablo 2 resurrected sockets, Round Shield (2, 2, and 2), and Rune Sceptre (2, 2, and 2).
Set #Five
Saber (2, 2, and 2), Sallet (2, 2, and 2), Scale Mail (2, 2, and 2), Scepter (2, 2, and 2), Scimitar (2, 2, and 2), Serpentskin Armor (2, 2, and 2), Sexton Trophy (2, 2, and 2), Shako (2, 2, and 2), Shamshir (2, 2, and 2), Short Staff (2, 2, and 2), Short Sword (2, 2, and 2), Skull Cap (2, 2, and 2), Small Shield (2, 2, and 2), Spiked Club (2, 2, and 2), Spiked Shield (2, 2, and 2), Splint Mail (2, 2, and 2), Stilleto (2, 2, and 2), Studded Leather (2, 2, and 2) for diablo 2 resurrected sockets, Succubae Skull (2, 2, and 2), Tomahawk (2, 2, and 2), and Tomb Wand (2, 2, and 2).
Set #Six
Trellised Armor (2, 2, and 2), Truncheon (2, 2, and 2), Tulwar (2, 2, and 2), Unearthed Wand (2, 2, and 2), Unraveller Head (2, 2, and 2), Walking Stick (2, 2, and 2), War Fist (2, 2, and 2), War Hat (2, 2, and 2), Wrist Blade (2, 2, and 2), Wrist Spike (2, 2, and 2), Zombie Head (2, 2, and 2), Bone Visage (2, 2, and 3), Corona (2, 2, and 3), Crown (2, 2, and 3), Death Mask (2, 2, and 3), Demonhead (2, 2, and 3), Grand Crown (2, 2, and 3), Great Helm (2, 2, and 3), Mask (2, 2, and 3), Spired Helm (2, 2, and 3), Winged Helm (2, 2, and 3), Alpha Helm (2, 3, and 3), Antlers (2, 3, and 3), Assault Helmet (2, 3, and 3), Avenger Guard (2, 3, and 3), and Blade Talons (2, 3, and 3).
Set #Seven
Blood Spirt (2, 3, and 3), Carnage Helm (2, 3, and 3), Cinquedeas (2, 3, and 3), Claws (2, 3, and 3), Conquerer Crown (2, 3, and 3), Destroyer Helm (2, 3, and 3), Dream Spirit (2, 3, and 3), Earth Spirit (2, 3, and 3), Falcon Mask (2, 3, and 3), Fanged Helm (2, 3, and 3), Fanged Knife (2, 3, and 3), Feral Claws (2, 3, and 3), Fury Visor (2, 3, and 3), Greater Claws (2, 3, and 3), Greater Talons (2, 3, and 3), Griffon Headress (2, 3, and 3), Guardian Crown (2, 3, and 3), Hawk Helm (2, 3, and 3), Horned Helm (2, 3, and 3), Hunter’s Guise (2, 3, and 3), Jawbone Cap (2, 3, and 3), Jawbone Visor (2, 3, and 3), Kriss (2, 3, and 3), Lion Helm (2, 3, and 3), Quhab (2, 3, and 3), Rage Mask (2, 3, and 3), and Runic Talons (2, 3, and 3).
Set #Eight
Sacred Feathers (2, 3, and 3), Savage Helmet (2, 3, and 3), Scissors Katar (2, 3, and 3), Scissors Quhab (2, 3, and 3), Scissors Suwayyah (2, 3, and 3), Sky Spirit (2, 3, and 3), Slayer Guard (2, 3, and 3), Spirit Mask (2, 3, and 3), Sun Spirit (2, 3, and 3), Suwayyah (2, 3, and 3), Totemic Mask (2, 3, and 3), Wolf Head (2, 3, and 3), Wrist Sword (2, 3, and 3), Clasped Orb (2, 3, and 3), Cloudy Sphere (2, 3, and 3), Crystalline Globe (2, 3, and 3), Demon Heart (2, 3, and 3), Dimensional Shard (2, 3, and 3), Dragon Stone (2, 3, and 3), Eagle Orb (2, 3, and 3), Eldritch Orb (2, 3, and 3), Glowing Orb (2, 3, and 3), Heavenly Stone (2, 3, and 3), Sacred Globe (2, 3, and 3), and Smoked Sphere (2, 3, and 3).
Set #Nine
Sparkling Ball (2, 3, and 3), Swirling Crystal (2, 3, and 3), Vortex Orb (2, 3, and 3), Ancient Shield (2, 3, and 3), Ancient Sword (3, 3, and 3), Arbalest (3, 3, and 3), Barbed Club (3, 3, and 3), Bardiche (3, 3, and 3), Blade Barrier (3, 3, and 3), Breast Plate (3, 3, and 3), Cuirass (3, 3, and 3), Devil Star (3, 3, and 3), Dragon Shield (3, 3, and 3), Edge Bow (3, 3, and 3), Espadon (3, 3, and 3), Gothic Shield (3, 3, and 3), Grand Scepter (3, 3, and 3), Holy Water Sprinkler (3, 3, and 3), Hyperion (3, 3, and 3), Hyperion Spear (3, 3, and 3), Jagged Star (3, 3, and 3), Khali Flail (3, 3, and 3), and Kite Shield (3, 3, and 3).
Set #Ten
Large Shield (3, 3, and 3), Legend Sword (3, 3, and 3), Light Crossbow (3, 3, and 3), Light Plate (3, 3, and 3), Linked Mail (3, 3, and 3), Lochaber Axe (3, 3, and 3), Long Staff (3, 3, and 3), Mage Plate (3, 3, and 3), Mesh Armor (3, 3, and 3), Morning Star (3, 3, and 3), Mythical Sword (3, 3, and 3), Ogre Axe (3, 3, and 3), Pavise (3, 3, and 3), Pellet Bow (3, 3, and 3), Quarterstaff (3, 3, and 3), Ring Mail (3, 3, and 3), Russet Armor (3, 3, and 3), Scutum (3, 3, and 3), Seraph Rod (3, 3, and 3), Sharktooth Armor (3, 3, and 3), Short Bow (3, 3, and 3), Spear (3, 3, and 3), Spider Bow (3, 3, and 3), Stalagmite (3, 3, and 3), SuperKhalimFlail (3, 3, and 3), Templar Coat (3, 3, and 3), Tigulated Mail (3, 3, and 3), Tower Shield (3, 3, and 3), Troll Nest (3, 3, and 3), Two-Handed Sword (3, 3, and 3), and Tyrant Club (3, 3, and 3).
Set #Eleven
War Spear (3, 3, and 3), War Sword (3, 3, and 3), Wirt’s Leg (3, 3, and 3), Aegis (3, 3, and 4), Monarch (3, 3, and 4), Ward (3, 3, and 4), Aerin Shield (3, 4, and 4), Akaran Rondache (3, 4, and 4), Akaran Targ (3, 4, and 4), Ancient Armor (3, 4, and 4), Kurast Shield (3, 4, and 4), Archon Plate (3, 4, and 4), Balrog Blade (3, 4, and 4), Balrog Skin (3, 4, and 4), Bastard Sword (3, 4, and 4), Battle Hammer (3, 4, and 4), Battle Sword (3, 4, and 4), Bill (3, 4, and 4), Blade Bow (3, 4, and 4), Boneweave (3, 4, and 4), Broad Sword (3, 4, and 4), Champion Sword (3, 4, and 4), and Chaos Armor (3, 4, and 4).
Set #Twelve
Claymore (3, 4, and 4), Colossus Voulge (3, 4, and 4), Composite Bow (3, 4, and 4), Conquest Sword (3, 4, and 4), Crossbow (3, 4, and 4), Crown Shield (3, 4, and 4), Cryptic Sword (3, 4, and 4), Dacian Falx (3, 4, and 4), Diamond Mail (3, 4, and 4), Double Bow (3, 4, and 4), Dusk Shroud (3, 4, and 4), Embossed Plate (3, 4, and 4), Full Plate Mail (3, 4, and 4), Fuscina (3, 4, and 4), Giant Sword (3, 4, and 4), Gorgon Crossbow (3, 4, and 4), Gothic Plate (3, 4, and 4), Gothic Sword (3, 4, and 4), Great Bow (3, 4, and 4), Great Hauberk (3, 4, and 4), Guilded Shield (3, 4, and 4), Hellforged Plate (3, 4, and 4), Heraldic Shield (3, 4, and 4), Highland Blade (3, 4, and 4), and Hunter’s Bow (3, 4, and 4).
Set #Thirteen
Kraken Shell (3, 4, and 4), Lacquered Plate (3, 4, and 4), Legendary Mallet (3, 4, and 4), Long Sword (3, 4, and 4), Loricated Mail (3, 4, and 4), Ornate Armor (3, 4, and 4), Protector Shield (3, 4, and 4), Razor Bow (3, 4, and 4), Rondache (3, 4, and 4), Royal Shield (3, 4, and 4), Rune Sword (3, 4, and 4), Sacred Armor (3, 4, and 4), Sacred Rondache (3, 4, and 4), Sacred Targe (3, 4, and 4), Scarab Husk (3, 4, and 4), Shadow Plate (3, 4, and 4), Siege Crossbow (3, 4, and 4), Stygian Pike (3, 4, and 4), Targe (3, 4, and 4), Trident (3, 4, and 4), Tusk Sword (3, 4, and 4), Vortex Shield (3, 4, and 4), Voulge (3, 4, and 4), War Hammer (3, 4, and 4), Wire Fleece (3, 4, and 4), Wyrmhide (3, 4, and 4), Zakarum Shield (3, 4, and 4), Ashwood Bow (3, 4, and 5), Battle Scythe (3, 4, and 5), and Brandi stock (3, 4, and 5).
Set #Fourteen
Cedar Bow (3, 4, and 5), Chu-Ko-Nu (3, 4, and 5), Colossal Sword (3, 4, and 5), Cryptic Axe (3, 4, and 5), Demon Crossbow (3, 4, and 5), Diamond Bow (3, 4, and 5), Flail (3, 4, and 5), Flamberge (3, 4, and 5), Hellforge Hammer (3, 4, and 5), Knout (3, 4, and 5), Long Bow (3, 4, and 5), Mancatcher (3, 4, and 5), Matriarchal Bow (3, 4, and 5), Partizan (3, 4, and 5), Poleaxe (3, 4, and 5), Repeating Crossbow (3, 4, and 5), Rune Bow (3, 4, and 5), Scourge (3, 4, and 5), Scythe (3, 4, and 5), Shadow Bow (3, 4, and 5), Short Battle Bow (3, 4, and 5), Short Siege Bow (3, 4, and 5), Short War Bow (3, 4, and 5), Stag Bow (3, 4, and 5), Thresher (3, 4, and 5), War Fork (3, 4, and 5), and Ward Bow (3, 4, and 5).
Set #Fifteen
Zweihander (3, 4, and 5), Ceremonial Bow (3, 4, and 5), Grand Matron Bow (3, 4, and 5), Reflex Bow (3, 4, and 5), Balista (3, 4, and 6), Bec-de-Corbin (3, 4, and 6), Ceremonial Pike (3, 4, and 6), Ceremonial Spear (3, 4, and 6), Colossus Blade (3, 4, and 6), Colossus Crossbow (3, 4, and 6), Crusader Bow (3, 4, and 6), Crystal Sword (3, 4, and 6), Dimensional Blade (3, 4, and 6), Executioner Sword (3, 4, and 6), Ghost Spear (3, 4, and 6), Giant Thresher (3, 4, and 6), Gothic Bow (3, 4, and 6), Great Maul (3, 4, and 6), Great Poleaxe (3, 4, and 6), Great Sword (3, 4, and 6), Grim Scythe (3, 4, and 6), Halberd (3, 4, and 6), and Heavy Crossbow (3, 4, and 6).
Set #Sixteen
Hydra Bow (3, 4, and 6), Lance (3, 4, and 6), Long Battle Bow (3, 4, and 6), Long Siege Bow (3, 4, and 6), Long War Bow (3, 4, and 6), Maiden Pike (3, 4, and 6), Maiden Spear (3, 4, and 6), Martel de Fer (3, 4, and 6), Matriarchal Pike (3, 4, and 6), Matriarchal Spear (3, 4, and 6), Maul (3, 4, and 6), Ogre Maul (3, 4, and 6), Phase Blade (3, 4, and 6), Pike (3, 4, and 6), Spetum (3, 4, and 6), Thunder Maul (3, 4, and 6), War Club (3, 4, and 6), War Pike (3, 4, and 6), War Scythe (3, 4, and 6), Yari (3, 4, and 6), Caduceus (3, 5, and 5), Divine Scepter (3, 5, and 5), War Scepter (3, 5, and 5), Axe (4, 4, and 4), Battle Staff (4, 4, and 4), Cedar Staff (4, 4, and 4), Cleaver (4, 4, and 4), Elder Staff (4, 4, and 4), Feral Axe (4, 4, and 4), and Gnarled Staff (4, 4, and 4).
Set #Seventeen
Gothic Staff (4, 4, and 4), Large Axe (4, 4, and 4), Military Axe (4, 4, and 4), Shillelah (4, 4, and 4), Small Crescent (4, 4, and 4), Battle Axe (4, 5, and 5), Bearded Axe (4, 5, and 5), Broad Axe (4, 5, and 5), Decapitator (4, 5, and 5), Double Axe (4, 5, and 5), Ettin Axe (4, 5, and 5), Silver Edged Axe (4, 5, and 5), Tabar (4, 5, and 5), Twin Axe (4, 5, and 5), Ancient Axe (4, 5, and 6), Berserker Axe (4, 5, and 6), Champion Axe (4, 5, and 6), Crowbill (4, 5, and 6), Giant Axe (4, 5, and 6), Glorious Axe (4, 5, and 6), Gothic Axe (4, 5, and 6), Great Axe (4, 5, and 6), Military Pick (4, 5, and 6), Naga (4, 5, and 6), War Axe (4, 5, and 6), War Spike (4, 5, and 6), Archon Staff (5, 5, and 6), Rune Staff (5, 5, and 6), and War Staff (5, 5, and 6).